Is Something Wrong With Gymbox Again
Knowing how to swallow an API is 1 of those magical skills that, once mastered, will cleft open a whole new globe of possibilities, and consuming APIs using Python is a not bad fashion to learn such a skill.
A lot of apps and systems you utilise on a daily basis are connected to an API. From very uncomplicated and mundane things, like checking the weather in the morn, to more addictive and fourth dimension-consuming actions, such as scrolling through your Instagram, TikTok, or Twitter feed, APIs play a central role.
In this tutorial, y'all'll learn:
- What an API is
- How yous tin consume APIs with your Python lawmaking
- What the most important API-related concepts are
- How to use Python to read information available through public APIs
By the end of this tutorial, yous'll be able to utilise Python to consume nigh APIs you lot come up across. If you're a programmer, knowing how to swallow APIs with Python will make you lot much more than proficient, specially when it comes to integrating your work with 3rd-party applications.
You can download the source lawmaking for the examples you'll encounter in this tutorial by clicking the link below:
Getting to Know APIs
API stands for application programming interface. In essence, an API acts as a advice layer, or as the name says, an interface, that allows different systems to talk to each other without having to sympathize exactly what each other does.
APIs tin can come up in many forms or shapes. They can be operating system APIs, used for deportment like turning on your photographic camera and sound for joining a Zoom phone call. Or they can be web APIs, used for web-focused deportment such equally liking images on your Instagram or fetching the latest tweets.
No matter the blazon, all APIs function mostly the aforementioned way. You usually make a request for information or data, and the API returns a response with what y'all requested. For example, every fourth dimension you open up Twitter or ringlet down your Instagram feed, yous're basically making a request to the API behind that app and getting a response in return. This is as well known every bit calling an API.
In this tutorial you lot'll focus more on the high-level APIs that communicate across networks, also called web APIs.
SOAP vs Residuum vs GraphQL
Even though some of the examples mentioned above are geared toward newer platforms or apps, web APIs have been effectually for quite a long fourth dimension. In the belatedly 1990s and early 2000s, two dissimilar design models became the norm in exposing data publicly:
- SOAP (Simple Object Access Protocol) is typically associated with the enterprise world, has a stricter contract-based usage, and is mostly designed around actions.
- Remainder (Representational State Transfer) is typically used for public APIs and is platonic for fetching data from the web. It's much lighter and closer to the HTTP specification than SOAP.
Nowadays, there's a new kid in town: GraphQL. Created by Facebook, GraphQL is a very flexible query language for APIs, where the clients decide exactly what they want to fetch from the server instead of the server deciding what to send.
If yous want to learn more than about the differences betwixt these iii design models, then hither are a few good resources:
- What is SOAP?
- What is Residual?
- API 101: Lather vs. Residuum
- Introduction to GraphQL
- Comparing API Architectural Styles: SOAP vs Residue vs GraphQL vs RPC
Fifty-fifty though GraphQL is on the rise and is being adopted by bigger and bigger companies, including GitHub and Shopify, the truth is that the majority of public APIs are still REST APIs. Therefore, for the purpose of this tutorial, y'all'll learn only about REST APIs and how to eat them using Python.
requests and APIs: A Lucifer Fabricated in Heaven
When consuming APIs with Python, there's only 1 library yous need: requests. With it, you should exist able to do most, if non all, of the actions required to consume any public API.
Y'all can install requests by running the following control in your console:
$ python -k pip install requests To follow the code examples in this tutorial, make certain you're using Python 3.8.1 and requests 2.24.0 or higher.
Calling Your First API Using Python
Enough talking—it's time to make your start API call! For the kickoff example, y'all'll be calling a popular API for generating random user data.
Throughout the tutorial, y'all'll see new APIs introduced in warning blocks like the ane below. Information technology'south a convenient way for y'all to scroll through afterward and chop-chop spot all the new APIs yous learned about.
The merely affair you demand to start with the Random User Generator API is to know which URL to call it with. For this instance, the URL to use is https://randomuser.me/api/, and this is the tiniest API call you tin brand:
>>>
>>> import requests >>> requests . become ( "https://randomuser.me/api/" ) <Response [200]> In this small-scale case, you import the requests library then fetch (or get) data from the URL for the Random User Generator API. But you don't really meet whatever of the data returned. What y'all go instead is a Response [200], which in API terms means everything went OK.
If you want to run across the actual data, then you can utilize .text from the returned Response object:
>>>
>>> import requests >>> response = requests . get ( "https://randomuser.me/api/" ) >>> response . text '{"results":[{"gender":"female person", "proper noun":{"title":"Ms","get-go":"Isobel","last":"Wang"}...' That's it! That's the very basics of API consumption. Yous managed to fetch your starting time random user from the Random User Generator API using Python and the requests library.
Endpoints and Resources
As y'all saw above, the first matter you need to know for consuming an API is the API URL, typically called the base of operations URL. The base URL structure is no different from the URLs you use for browsing Google, YouTube, or Facebook, though it usually contains the word api. This is not mandatory, just more of a rule of thumb.
For example, here are the base URLs for a few well-known API players:
-
https://api.twitter.com -
https://api.github.com -
https://api.stripe.com
Equally you can come across, all of the above start with https://api and include the remaining official domain, such equally .twitter.com or .github.com. There's no specific standard for how the API base URL should expect, but information technology'southward quite common for information technology to mimic this structure.
If you effort opening any of the above links, then you'll discover that nigh of them will return an mistake or inquire for credentials. That's because APIs sometimes require authentication steps before yous can use them. You'll learn more than about this a chip later in the tutorial.
Next, using the just-introduced TheDogAPI, you'll attempt to make a basic asking to see how it may differ from the Random User Generator API you tried above:
>>>
>>> import requests >>> response = requests . become ( "https://api.thedogapi.com/" ) >>> response . text '{"message":"The Dog API"}' In this case, when calling the base URL, you become this generic message maxim The Dog API. This is because you're calling the base URL, which is typically used for very bones information about an API, not the existent data.
Calling the base URL alone isn't a lot of fun, merely that'due south where endpoints come in handy. An endpoint is a part of the URL that specifies what resource yous want to fetch. Well-documented APIs usually comprise an API reference, which is extremely useful for knowing the exact endpoints and resource an API has and how to use them.
You lot can bank check the official documentation to learn more almost how to use TheDogAPI and what endpoints are available. In there, y'all'll find a /breeds endpoint that you can utilise to fetch all the available breed resource or objects.
If y'all scroll downward, then you'll find the Transport a Test Asking section, where you'll meet a form similar the following:
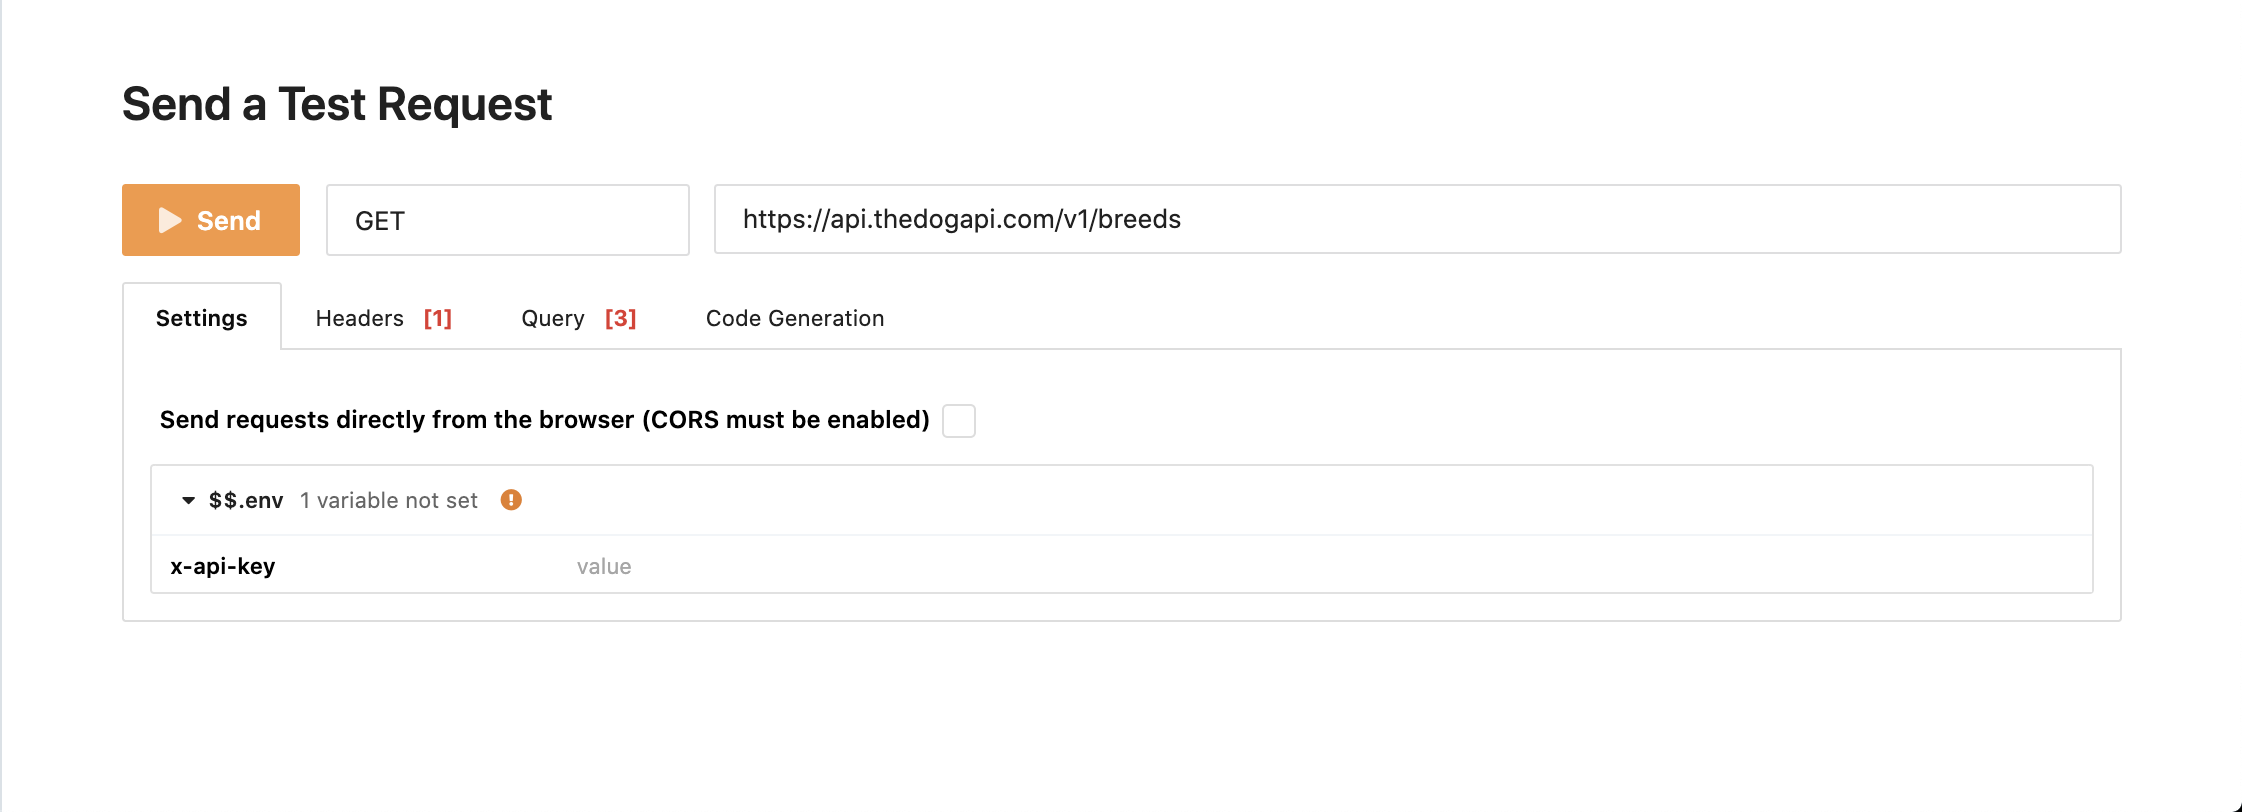
This is something that y'all'll come across in many API documentations: a way for you to quickly test the API directly from the documentation page. In this case, you lot tin can click Ship to quickly go the result of calling that endpoint. Et voilà, you lot just called an API without having to write whatever code for it.
Now, requite it a try in code locally using the breeds endpoint and some of the API noesis yous already have:
>>>
>>> response = requests . go ( "https://api.thedogapi.com/v1/breeds" ) >>> response . text '[{"weight":{"imperial":"vi - 13","metric":"three - vi"},"height": ...}]' There you become, your first breed listing using the dog API!
If you lot're a true cat person, don't fret. In that location's an API for you, as well, with the same endpoint just a different base URL:
>>>
>>> response = requests . become ( "https://api.thecatapi.com/v1/breeds" ) >>> response . text '[{..."id":"abys","name":"Abyssinian"}]' I bet you're already thinking about different ways you can use these APIs to make some cute side project, and that'south the slap-up thing well-nigh APIs. Once you start using them, there's nix stopping you from turning a hobby or passion into a fun little project.
Before you move forward, one thing you demand to know nearly endpoints is the difference between http:// and https://. In a nutshell, HTTPS is the encrypted version of HTTP, making all traffic between the client and the server much safer. When consuming public APIs, y'all should definitely stay away from sending any individual or sensitive information to http:// endpoints and use only those APIs that provide a secure https:// base URL.
For more than information on why it'due south important to stick to HTTPS when online browsing, check out Exploring HTTPS With Python.
In the next section, you lot'll dig a bit further into the master components of an API call.
Asking and Response
As y'all very briefly read above, all interactions between a client—in this case your Python panel—and an API are split into a asking and a response:
- Requests contain relevant information regarding your API request call, such equally the base URL, the endpoint, the method used, the headers, and and then on.
- Responses contain relevant data returned by the server, including the data or content, the status lawmaking, and the headers.
Using TheDogAPI again, you can drill down a scrap more into what exactly is inside the Asking and Response objects:
>>>
>>> response = requests . become ( "https://api.thedogapi.com/v1/breeds" ) >>> response <Response [200]> >>> response . request <PreparedRequest [Go]> >>> request = response . request >>> request . url 'https://api.thedogapi.com/v1/breeds' >>> request . path_url '/v1/breeds' >>> request . method 'GET' >>> request . headers {'User-Agent': 'python-requests/2.24.0', 'Accept-Encoding': 'gzip, debunk', 'Accept': '*/*', 'Connexion': 'keep-alive'} >>> response <Response [200]> >>> response . text '[{"weight":{"imperial":"6 - 13","metric":"three - 6"}, "height":{"imperial":"9 - eleven.5","metric":"23 - 29"},"id":1, "proper noun":"Affenpinscher", ...}]' >>> response . status_code 200 >>> response . headers {'Cache-Command': 'postal service-cheque=0, pre-check=0', 'Content-Encoding': 'gzip', 'Content-Type': 'awarding/json; charset=utf-8', 'Appointment': 'Saturday, 25 Jul 2020 17:23:53 GMT'...} The case above shows you a few of the most of import attributes bachelor for Request and Response objects.
Y'all'll learn more near some of these attributes in this tutorial, but if you want to dig even farther, so you tin can cheque Mozilla's documentation on HTTP messages for a more in-depth explanation of each aspect.
Status Codes
Status codes are 1 of the near of import pieces of data to await for in any API response. They tell yous if your request was successful, if it's missing data, if it'south missing credentials, and so on.
With fourth dimension, y'all'll recognize the different status codes without assist. But for now, hither'southward a listing with some of the near common status codes you'll find:
| Status lawmaking | Description |
|---|---|
200 OK | Your request was successful! |
201 Created | Your request was accepted and the resources was created. |
400 Bad Asking | Your request is either wrong or missing some information. |
401 Unauthorized | Your asking requires some additional permissions. |
404 Not Found | The requested resource does non exist. |
405 Method Not Allowed | The endpoint does not allow for that specific HTTP method. |
500 Internal Server Fault | Your request wasn't expected and probably bankrupt something on the server side. |
Yous saw 200 OK before in the examples yous executed, and you might fifty-fifty recognize 404 Not Found from browsing the web.
Y'all can check the status of a response using .status_code and .reason. The requests library also prints the condition code in the representation of the Response object:
>>>
>>> response = requests . get ( "https://api.thedogapi.com/v1/breeds" ) >>> response <Response [200]> >>> response . status_code 200 >>> response . reason 'OK' The asking to a higher place returns 200, then you can consider it a successful asking. But at present have a look at a declining request triggered when yous include a typo in the endpoint /breedz:
>>>
>>> response = requests . become ( "https://api.thedogapi.com/v1/breedz" ) >>> response <Response [404]> >>> response . status_code 404 >>> response . reason 'Not Found' Every bit y'all can see, the /breedz endpoint doesn't exist, and so the API returns a 404 Not Found status code.
You can use these condition codes to quickly see if your asking needs to exist inverse or if you lot should check the documentation again for any typos or missing pieces.
Response Content
Every bit you merely learned, the type of content you find in the API response will vary according to the Content-Type header. To properly read the response contents according to the different Content-Type headers, the requests package comes with a couple of unlike Response attributes you can employ to manipulate the response data:
-
.textreturns the response contents in Unicode format. -
.contentreturns the response contents in bytes.
You already used the .text aspect above. But for some specific types of data, like images and other nontextual data, using .content is typically a better arroyo, even if it returns a very similar result to .text:
>>>
>>> response = requests . get ( "https://api.thedogapi.com/v1/breeds/1" ) >>> response . headers . get ( "Content-Type" ) 'application/json; charset=utf-8' >>> response . content b'{"weight":{"royal":"half-dozen - xiii","metric":"3 - 6"}...' As you can run across, in that location isn't a big difference between .content and the previously used .text.
However, by looking at the response's Content-Type header, you can see the content is application/json;, a JSON object. For that kind of content, the requests library includes a specific .json() method that you can use to immediately catechumen the API bytes response into a Python data structure:
>>>
>>> response = requests . get ( "https://api.thedogapi.com/v1/breeds/1" ) >>> response . headers . get ( "Content-Type" ) 'application/json; charset=utf-8' >>> response . json () {'weight': {'imperial': '6 - 13', 'metric': 'three - six'}, 'height': {'imperial': '9 - eleven.5', 'metric': '23 - 29'} ...} >>> response . json ()[ "name" ] 'Affenpinscher' As you lot can encounter, after executing response.json(), you get a dictionary that you're able to employ every bit you lot'd use whatever other dictionary in Python.
Now, looking back at the contempo case yous ran using the PlaceGOAT API, effort to fetch that same caprine animal image and have a look at its content:
>>>
>>> response = requests . get ( "http://placegoat.com/200/200" ) >>> response <Response [200]> >>> response . headers . get ( "Content-Type" ) 'epitome/jpeg' >>> response . content b'\xff\xd8\xff\xe0\x00\x10JFIF\x00\x01\x01\x01\x00H\...' In this case, because you lot're requesting an epitome, .content isn't very helpful. In fact, information technology's near impossible to understand. Yet, yous know this is a JPEG image, and then you tin try storing it into a file and meet what happens:
>>>
>>> response = requests . become ( "http://placegoat.com/200/200" ) >>> response <Response [200]> >>> response . headers . get ( "Content-Blazon" ) 'image/jpeg' >>> file = open up ( "goat.jpeg" , "wb" ) >>> file . write ( response . content ) >>> file . close () Now if you open up the folder you're working from, and then you'll find a goat.jpeg file, which is a random image of a goat that yous just fetched using an API. Isn't that amazing?
HTTP Methods
When calling an API, there are a few different methods, as well chosen verbs, that you tin can use to specify what action you desire to execute. For instance, if y'all wanted to fetch some information, you'd employ the method GET, and if you wanted to create some information, and then you'd employ the method Post.
When purely consuming data using APIs, y'all'll typically stick to GET requests, simply here'due south a listing of the almost mutual methods and their typical use case:
| HTTP Method | Description | Requests method |
|---|---|---|
POST | Create a new resource. | requests.mail() |
GET | Read an existing resource. | requests.become() |
PUT | Update an existing resource. | requests.put() |
DELETE | Delete an existing resource. | requests.delete() |
These iv methods are typically referred to as CRUD operations as they let you lot to create, read, update and delete resources.
If yous're curious virtually the remaining HTTP methods, or if yous just want to learn a fleck more than near those already mentioned, then have a wait through Mozilla's documentation.
Until now, y'all've only used .get() to fetch information, merely you tin can use the requests package for all the other HTTP methods every bit well:
>>>
>>> requests . post ( "https://api.thedogapi.com/v1/breeds/i" ) >>> requests . get ( "https://api.thedogapi.com/v1/breeds/1" ) >>> requests . put ( "https://api.thedogapi.com/v1/breeds/1" ) >>> requests . delete ( "https://api.thedogapi.com/v1/breeds/1" ) If yous try these on your console, so yous'll observe that near of them will return a 405 Method Not Allowed status lawmaking. That'south considering not all endpoints will permit for POST, PUT, or DELETE methods. Specially when you lot're reading information using public APIs, yous'll find that most APIs will merely allow GET requests since you're not allowed to create or change the existing data.
Query Parameters
Sometimes when you phone call an API, you become a ton of data that you don't need or want. For example, when calling TheDogAPI's /breeds endpoint, y'all get a lot of data about a given breed. But in some cases, you might want to extract just certain information about a given breed. That's where query parameters come in!
You might accept seen or used query parameters when browsing online. For example when watching a YouTube video, you have a URL similar https://world wide web.youtube.com/watch?v=aL5GK2LVMWI. The v= in the URL is what yous call a query parameter. It typically comes later the base URL and endpoint.
To add a query parameter to a given URL, you take to add a question marking (?) before the first query parameter. If you lot want to accept multiple query parameters in your request, then you can split them with an ampersand (&).
The same YouTube URL to a higher place with multiple query parameters would await similar this: https://www.youtube.com/watch?v=aL5GK2LVMWI&t=75.
In the API world, query parameters are used as filters you tin can send with your API request to farther narrow downwardly the responses. For example, going back to the Random User Generator API, y'all know how to generate a random user:
>>>
>>> requests . become ( "https://randomuser.me/api/" ) . json () {'results': [{'gender': 'male', 'proper name': {'title': 'Mr', 'get-go': 'Silvijn', 'last': 'Van Bekkum'}, 'location': {'street': {'number': 2480, 'name': 'Hooijengastrjitte'}, 'city': 'Terherne', 'land': 'Drenthe', 'land': 'Netherlands', 'postcode': 59904...} Withal, let's say you lot specifically want to generate only random female users. According to the documentation, you can utilize the query parameter gender= for that:
>>>
>>> requests . get ( "https://randomuser.me/api/?gender=female" ) . json () {'results': [{'gender': 'female', 'name': {'title': 'Mrs', 'first': 'Marjoleine', 'last': 'Van Huffelen'}, 'location': {'street': {'number': 8993, 'proper noun': 'De Teebus'}, 'urban center': 'West-Terschelling', 'state': 'Limburg', 'country': 'Netherlands', 'postcode': 24241...} That's great! Now let's say you lot want to generate but female users from Federal republic of germany. Again, looking through the documentation, you find a section on nationality, and you tin can use the query parameter nat= for that:
>>>
>>> requests . get ( "https://randomuser.me/api/?gender=female person&nat=de" ) . json () {'results': [{'gender': 'female', 'name': {'championship': 'Ms', 'offset': 'Marita', 'concluding': 'Hertwig'}, 'location': {'street': {'number': 1430, 'name': 'Waldstraße'}, 'city': 'Velden', 'state': 'Rheinland-Pfalz', 'country': 'Federal republic of germany', 'postcode': 30737...} Using query parameters, you lot can start fetching more specific data from an API, making the whole feel a scrap more than tailored to your needs.
To avert having to rebuild the URL over and over once again, you can employ the params aspect to transport in a dictionary of all query parameters to append to a URL:
>>>
>>> query_params = { "gender" : "female" , "nat" : "de" } >>> requests . get ( "https://randomuser.me/api/" , params = query_params ) . json () {'results': [{'gender': 'female', 'proper noun': {'title': 'Ms', 'first': 'Janet', 'last': 'Weyer'}, 'location': {'street': {'number': 2582, 'name': 'Meisenweg'}, 'metropolis': 'Garding', 'state': 'Mecklenburg-Vorpommern', 'state': 'Germany', 'postcode': 56953...} Yous can apply the above to any other API you like. If you go back to TheDogAPI, the documentation has a mode for you to filter the breeds endpoint to return only the breeds that match a specific proper name. For example, if y'all wanted to look for the Labradoodle breed, then yous could exercise that with the query parameter q:
>>>
>>> query_params = { "q" : "labradoodle" } >>> endpoint = "https://api.thedogapi.com/v1/breeds/search" >>> requests . get ( endpoint , params = query_params ) . json () [{'weight': {'imperial': '45 - 100', 'metric': '20 - 45'}, 'height': {'imperial': 'xiv - 24', 'metric': '36 - 61'}, 'id': 148, 'proper noun': 'Labradoodle', 'breed_group': 'Mixed'...}] There you have it! By sending the query parameter q with the value labradoodle, you're able to filter all breeds that match that specific value.
With the help of query parameters, you're able to farther narrow your requests and specify exactly what you're looking for. About APIs you'll find online volition have some sort of query parameters that y'all can use to filter data. Remember to look through the documentation and API reference to find them.
Learning Advanced API Concepts
Now that you take a good agreement of the basics of API consumption using Python, there are a few more advanced topics that are worth touching upon, fifty-fifty if briefly, such as authentication, pagination, and charge per unit limiting.
Authentication
API authentication is perhaps the most complex topic covered in this tutorial. Even though a lot of public APIs are free and completely public, an even bigger number of APIs are available behind some form of authentication. There are numerous APIs that crave authentication, only here are a few good examples:
- GitHub API
- Twitter API
- Instagram API
Authentication approaches range from the simplistic and straightforward, similar those using API keys or Basic Authentication, to much more than complex and safer techniques, like OAuth.
Typically, calling an API without credentials or with the incorrect ones volition return a 401 Unauthorized or 403 Forbidden status code.
API Keys
The most common level of authentication is the API key. These keys are used to place you as an API user or client and to trace your use of the API. API keys are typically sent as a request header or equally a query parameter.
For this instance, you'll have a go at NASA's Mars Rover Photograph API, and you lot'll fetch pictures taken on July 1, 2020. For testing purposes, you tin can utilize the DEMO_KEY API central that NASA provides by default. Otherwise, yous can quickly generate your ain by going to NASA's main API page and clicking Get Started.
You can add the API key to your request by appending the api_key= query parameter:
>>>
>>> endpoint = "https://api.nasa.gov/mars-photos/api/v1/rovers/marvel/photos" >>> # Replace DEMO_KEY beneath with your own key if yous generated one. >>> api_key = "DEMO_KEY" >>> query_params = { "api_key" : api_key , "earth_date" : "2020-07-01" } >>> response = requests . get ( endpoint , params = query_params ) >>> response <Response [200]> So far, so good. You managed to make an authenticated request to NASA's API and to go back a 200 OK response.
At present take a look at the Response object and try to extract some pictures from it:
>>>
>>> response . json () {'photos': [{'id': 754118, 'sol': 2809, 'camera': {'id': 20, 'proper name': 'FHAZ', 'rover_id': 5, 'full_name': 'Front Hazard Avoidance Camera'}, 'img_src': 'https://mars.nasa.gov/msl-raw-images/...JPG', 'earth_date': '2020-07-01', 'rover': {'id': 5, 'name': 'Curiosity', 'landing_date': '2012-08-06', 'launch_date': '2011-eleven-26', 'status': 'active'}}, ... } >>> photos = response . json ()[ "photos" ] >>> print ( f "Found { len ( photos ) } photos" ) Constitute 12 photos >>> photos [ iv ][ "img_src" ] 'https://mars.nasa.gov/msl-raw-images/proj/msl/redops/ods/surface/sol/02809/opgs/edr/rcam/RRB_646869036EDR_F0810628RHAZ00337M_.JPG' Using .json() to convert the response to a Python dictionary and then fetching the photos field from the response, you lot're able to iterate through all Photograph objects and even fetch a specific photo's image URL. If you open up that URL in your browser, then you'll come across the post-obit moving-picture show of Mars taken past one of the Mars rovers:

For this example, you picked a specific earth_date (2020-07-01) and then a specific photograph from the response dictionary (4). Before moving forward, try changing the date or fetching pictures from a different camera to run into how information technology changes the end result.
OAuth: Getting Started
Another very mutual standard in API hallmark is OAuth. You'll learn but the essentials of OAuth in this tutorial since it'southward a very broad topic.
Even if you weren't enlightened that it was part of OAuth, you may have seen and used the OAuth flow multiple times. Every time an app or platform has a Login With or Go on With option, that's the starting indicate of an OAuth flow:
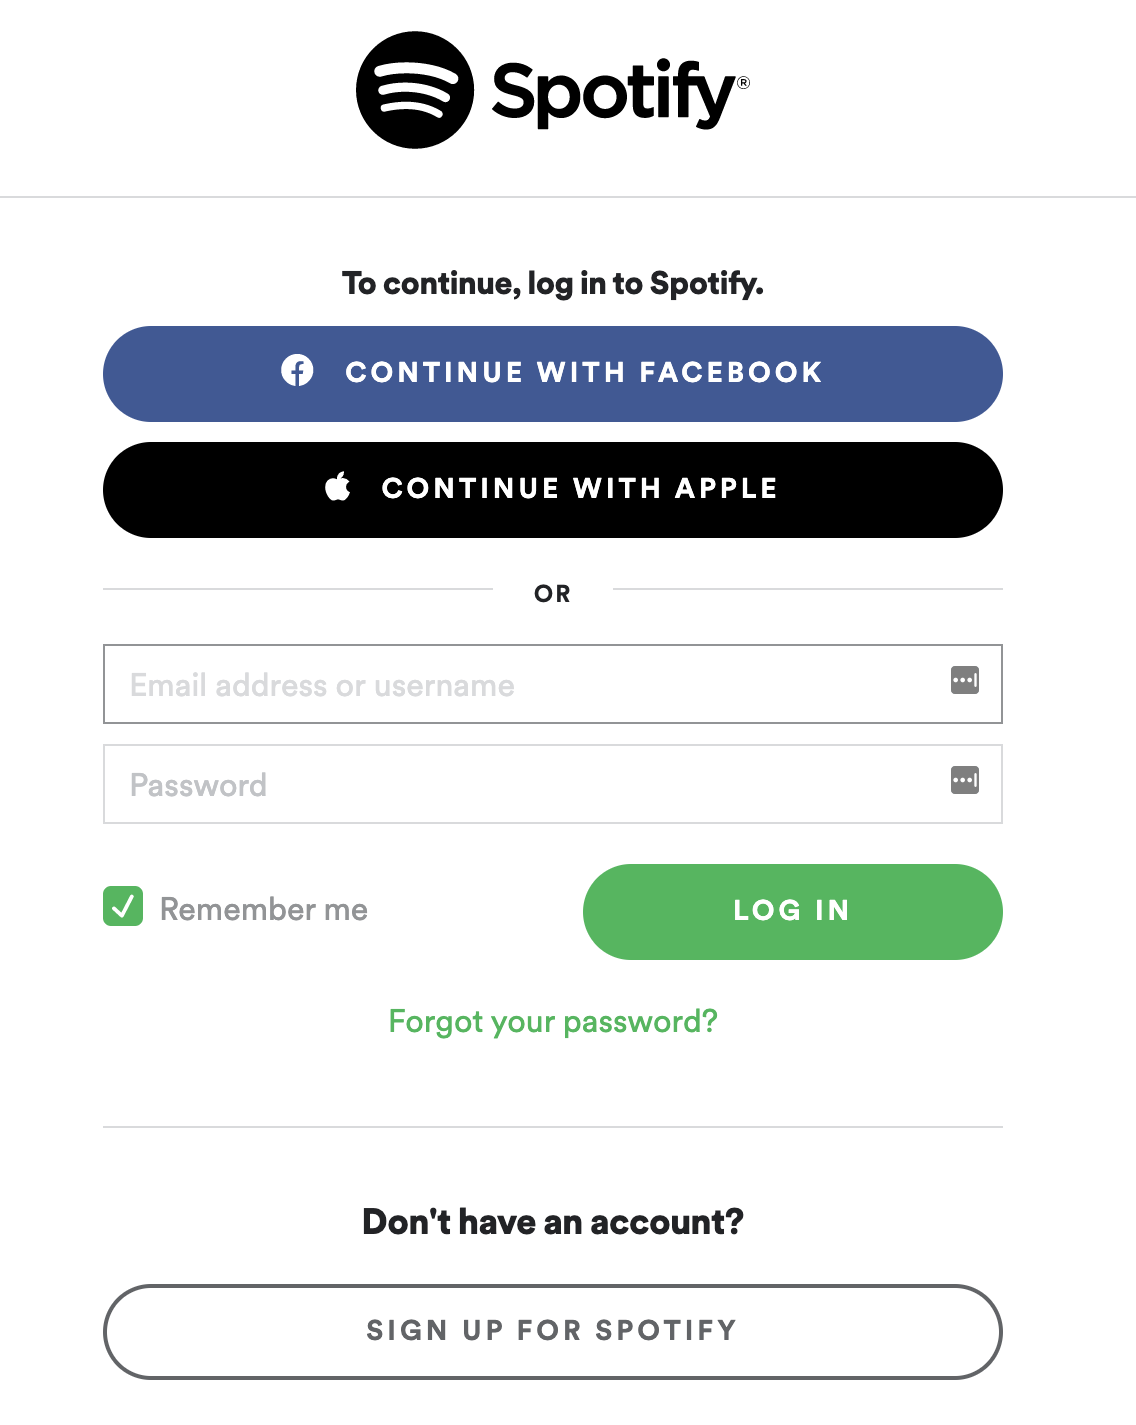
Here'due south a step-by-step breakdown of what will happen if you lot click Keep With Facebook:
-
The Spotify app will ask the Facebook API to start an authentication flow. To do this, the Spotify app will transport its application ID (
client_id) and a URL (redirect_uri) to redirect the user afterward success or error. -
You'll be redirected to the Facebook website and asked to log in with your credentials. The Spotify app won't encounter or have admission to these credentials. This is the nigh important benefit of OAuth.
-
Facebook will prove you all the data the Spotify app is requesting from your profile and ask yous to accept or reject sharing that data.
-
If you accept giving Spotify access to your data, then you'll be redirected back to the Spotify app, already logged in.
When going through step 4, Facebook will provide Spotify with a special credential (access_token) that can exist used repeatedly to fetch your information. This specific Facebook login token is valid for sixty days, merely other apps might have unlike expiration periods. If you lot're curious, then Facebook has a settings folio that you can check to see which apps accept been given your Facebook access token.
Now, from a more technical standpoint, here are the things y'all demand to know when consuming APIs using OAuth:
- You need to create an application that volition take an ID (
app_idorclient_id) and a secret (app_secretorclient_secret). - Yous need to take a redirect URL (
redirect_uri), which the API will use to send data to you. - You'll get a lawmaking as the outcome of the hallmark, which you need to exchange for an access token.
There are a few variations to the above, merely generally speaking, most OAuth flows will have steps like to these.
Next, you'll dive into an instance using the GitHub API!
OAuth: A Practical Example
As you saw above, the first thing you need to do is create an application. There's a great step-by-footstep explanation on how to do this in the GitHub documentation that you can follow. The only thing to continue in mind is to utilise the https://httpbin.org/anything URL mentioned above for the Dominance callback URL field.
In one case you lot've created your app, copy and paste the Client_ID and Client_Secret, together with your selected redirect URL, into a Python file called github.py:
import requests # Supercede the following variables with your Client ID and Client Undercover CLIENT_ID = "<REPLACE_WITH_CLIENT_ID>" CLIENT_SECRET = "<REPLACE_WITH_CLIENT_SECRET>" # REPLACE the following variable with what you lot added in the # "Dominance callback URL" field REDIRECT_URI = "<REPLACE_WITH_REDIRECT_URI>" Now that you take all the important variables in identify, you demand to be able to create a link to redirect the user to their GitHub account, as explained in the GitHub documentation:
def create_oauth_link (): params = { "client_id" : CLIENT_ID , "redirect_uri" : REDIRECT_URI , "telescopic" : "user" , "response_type" : "code" , } endpoint = "https://github.com/login/oauth/qualify" response = requests . become ( endpoint , params = params ) url = response . url return url In this slice of code, yous starting time define the required parameters that the API expects and then phone call the API using the requests package and .get().
When you make the request to the /login/oauth/authorize endpoint, the API will automatically redirect y'all to the GitHub website. In that case, you want to fetch the url parameter from the response. This parameter contains the exact URL that GitHub is redirecting you to.
The next step in the say-so flow is to commutation the code you get for an access token. Again, post-obit the steps in GitHub's documentation, you can make a method for information technology:
def exchange_code_for_access_token ( code = None ): params = { "client_id" : CLIENT_ID , "client_secret" : CLIENT_SECRET , "redirect_uri" : REDIRECT_URI , "code" : code , } headers = { "Take" : "application/json" } endpoint = "https://github.com/login/oauth/access_token" response = requests . post ( endpoint , params = params , headers = headers ) . json () return response [ "access_token" ] Hither, you lot brand a Postal service request to exchange the code for an admission token. In this request, you take to transport your CLIENT_SECRET and lawmaking so that GitHub tin can validate that this specific code was initially generated by your application. Simply then will the GitHub API generate a valid admission token and return information technology to y'all.
Now you can add the following to your file and effort running it:
link = create_oauth_link () print ( f "Follow the link to offset the authentication with GitHub: { link } " ) code = input ( "GitHub code: " ) access_token = exchange_code_for_access_token ( lawmaking ) print ( f "Exchanged code { code } with access token: { access_token } " ) If everything goes according to plan, then you should be rewarded with a valid access token that you tin can use to brand calls to the GitHub API, impersonating the authenticated user.
Now try adding the following code to fetch your user contour using the User API and to print your name, username, and number of private repositories:
def print_user_info ( access_token = None ): headers = { "Dominance" : f "token { access_token } " } endpoint = "https://api.github.com/user" response = requests . go ( endpoint , headers = headers ) . json () proper name = response [ "proper noun" ] username = response [ "login" ] private_repos_count = response [ "total_private_repos" ] impress ( f " { proper noun } ( { username } ) | private repositories: { private_repos_count } " ) Now that you have a valid access token, you need to transport it on all your API requests using the Authorisation header. The response to your request volition be a Python dictionary containing all the user information. From that lexicon, y'all want to fetch the fields name, login, and total_private_repos. Yous tin besides print the response variable to see what other fields are available.
Alright, that should be it! The only matter left to practise is to put it all together and try information technology out:
one import requests 2 3 # Replace the following variables with your Customer ID and Client Undercover 4 CLIENT_ID = "<REPLACE_WITH_CLIENT_ID>" 5 CLIENT_SECRET = "<REPLACE_WITH_CLIENT_SECRET>" 6 seven # Supercede the following variable with what you added in 8 # the "Authorization callback URL" field 9 REDIRECT_URI = "<REPLACE_WITH_REDIRECT_URI>" ten 11 def create_oauth_link (): 12 params = { 13 "client_id" : CLIENT_ID , 14 "redirect_uri" : REDIRECT_URI , 15 "scope" : "user" , 16 "response_type" : "code" , 17 } 18 endpoint = "https://github.com/login/oauth/authorize" 19 response = requests . go ( endpoint , params = params ) xx url = response . url 21 return url 22 23 def exchange_code_for_access_token ( code = None ): 24 params = { 25 "client_id" : CLIENT_ID , 26 "client_secret" : CLIENT_SECRET , 27 "redirect_uri" : REDIRECT_URI , 28 "lawmaking" : code , 29 } 30 headers = { "Accept" : "application/json" } 31 endpoint = "https://github.com/login/oauth/access_token" 32 response = requests . mail ( endpoint , params = params , headers = headers ) . json () 33 render response [ "access_token" ] 34 35 def print_user_info ( access_token = None ): 36 headers = { "Authority" : f "token { access_token } " } 37 endpoint = "https://api.github.com/user" 38 response = requests . get ( endpoint , headers = headers ) . json () 39 name = response [ "name" ] 40 username = response [ "login" ] 41 private_repos_count = response [ "total_private_repos" ] 42 print ( 43 f " { name } ( { username } ) | individual repositories: { private_repos_count } " 44 ) 45 46 link = create_oauth_link () 47 impress ( f "Follow the link to beginning the authentication with GitHub: { link } " ) 48 code = input ( "GitHub code: " ) 49 access_token = exchange_code_for_access_token ( code ) 50 impress ( f "Exchanged code { code } with admission token: { access_token } " ) 51 print_user_info ( access_token = access_token ) Hither's what happens when you run the code in a higher place:
- A link is generated asking you to go to a GitHub page for authentication.
-
Later on following that link and logging in with your GitHub credentials, you're redirected to your defined callback URL with a
codefield in the query parameters:

Example GitHub OAuth Code -
After pasting that lawmaking in your panel, yous commutation the code for a reusable access token.
- Your user information is fetched using that access token. Your name, username, and private repositories count are printed.
If you follow the steps to a higher place, and then you should get a like cease upshot to this 1:
$ John Doe (johndoe) | number of private repositories: 42 In that location are quite a few steps to take hither, but it's of import that you have the time to really understand each one. Most APIs using OAuth will share a lot of the aforementioned behavior, so knowing this process well will unlock a lot of potential when y'all're reading data from APIs.
Experience gratuitous to ameliorate this case and add more functionality, such as getting your public and starred repositories or iterating through your followers to identify the most popular ones.
There are enough of nifty resources online about OAuth, and if consuming APIs behind OAuth is what y'all really demand, then I'd advise you to practise a flake more research on that topic specifically. Here are a few good places to beginning:
- What the Heck is OAuth?
- OAuth 2 Simplified
- OAuth ii.0 Say-so Framework
From an API consumption perspective, knowing OAuth will definitely come up very in handy when you're interacting with public APIs. Most APIs take adopted OAuth equally their authentication standard, and with proficient reason.
Rate Limiting
Given that APIs are public facing and tin be used by anyone, people with bad intentions often effort to abuse them. To prevent such attacks, you can use a technique called rate limiting, which restricts the number of requests that users can make in a given time frame.
Some APIs may actually cake your IP or API keys if yous go over the defined rate limit also often. Be careful not to exceed the limits set by the API developers. Otherwise, you might have to wait a while before calling that API again.
For the example below, you'll once again apply the GitHub API and the /events endpoint. According to its documentation, GitHub allows well-nigh threescore unauthenticated requests per hour. If yous go to a higher place that, then you'll get a 403 status code and won't be able to make any more than API calls for quite some time.
For the sake of demonstration, you'll purposefully try to exceed GitHub's rate limit to run into what happens. In the code below, you'll request data until yous get a status code other than 200 OK:
>>>
>>> endpoint = "https://api.github.com/events" >>> for i in range ( 100 ): >>> response = requests . become ( endpoint ) >>> print ( f " { i } - { response . status_code } " ) >>> if response . status_code != 200 : >>> break 0 - 200 i - 200 ii - 200 3 - 200 4 - 200 5 - 200 ... 55 - 200 56 - 200 57 - 403 >>> response <Response [403]> >>> response . json () {'message': "API charge per unit limit exceeded for <ip-address>.", 'documentation_url': 'https://programmer.github.com/v3/#charge per unit-limiting'} There y'all take it: After about sixty requests, the API stopped returning 200 OK responses and returned a 403 Forbidden response instead, informing you that you exceeded the API rate limit.
Some APIs, like GitHub's, might even include additional information in the headers regarding your current rate limit and how many requests you lot accept remaining. These are very helpful for you to avoid going over the divers limit. Have a look at the latest response.headers to see if you can find those specific rate limiting headers.
Consuming APIs With Python: Practical Examples
Now that you know all the theory and have experimented with a few APIs, you tin can consolidate those learnings with some more practical examples. You tin modify the examples beneath to tailor them to your own purposes.
You lot tin follow along with the examples by downloading the source lawmaking available at the link beneath:
Searching and Fetching Trending GIFs
How well-nigh making a pocket-sized script that fetches the top three trending GIFs from the GIPHY website? To do this, you need to create an app and get an API cardinal from GIPHY. You can find instructions past expanding the box below, and you can as well check GIPHY's quickstart documentation.
Step 1: Create a GIPHY Account
You should beginning past creating a GIPHY business relationship:
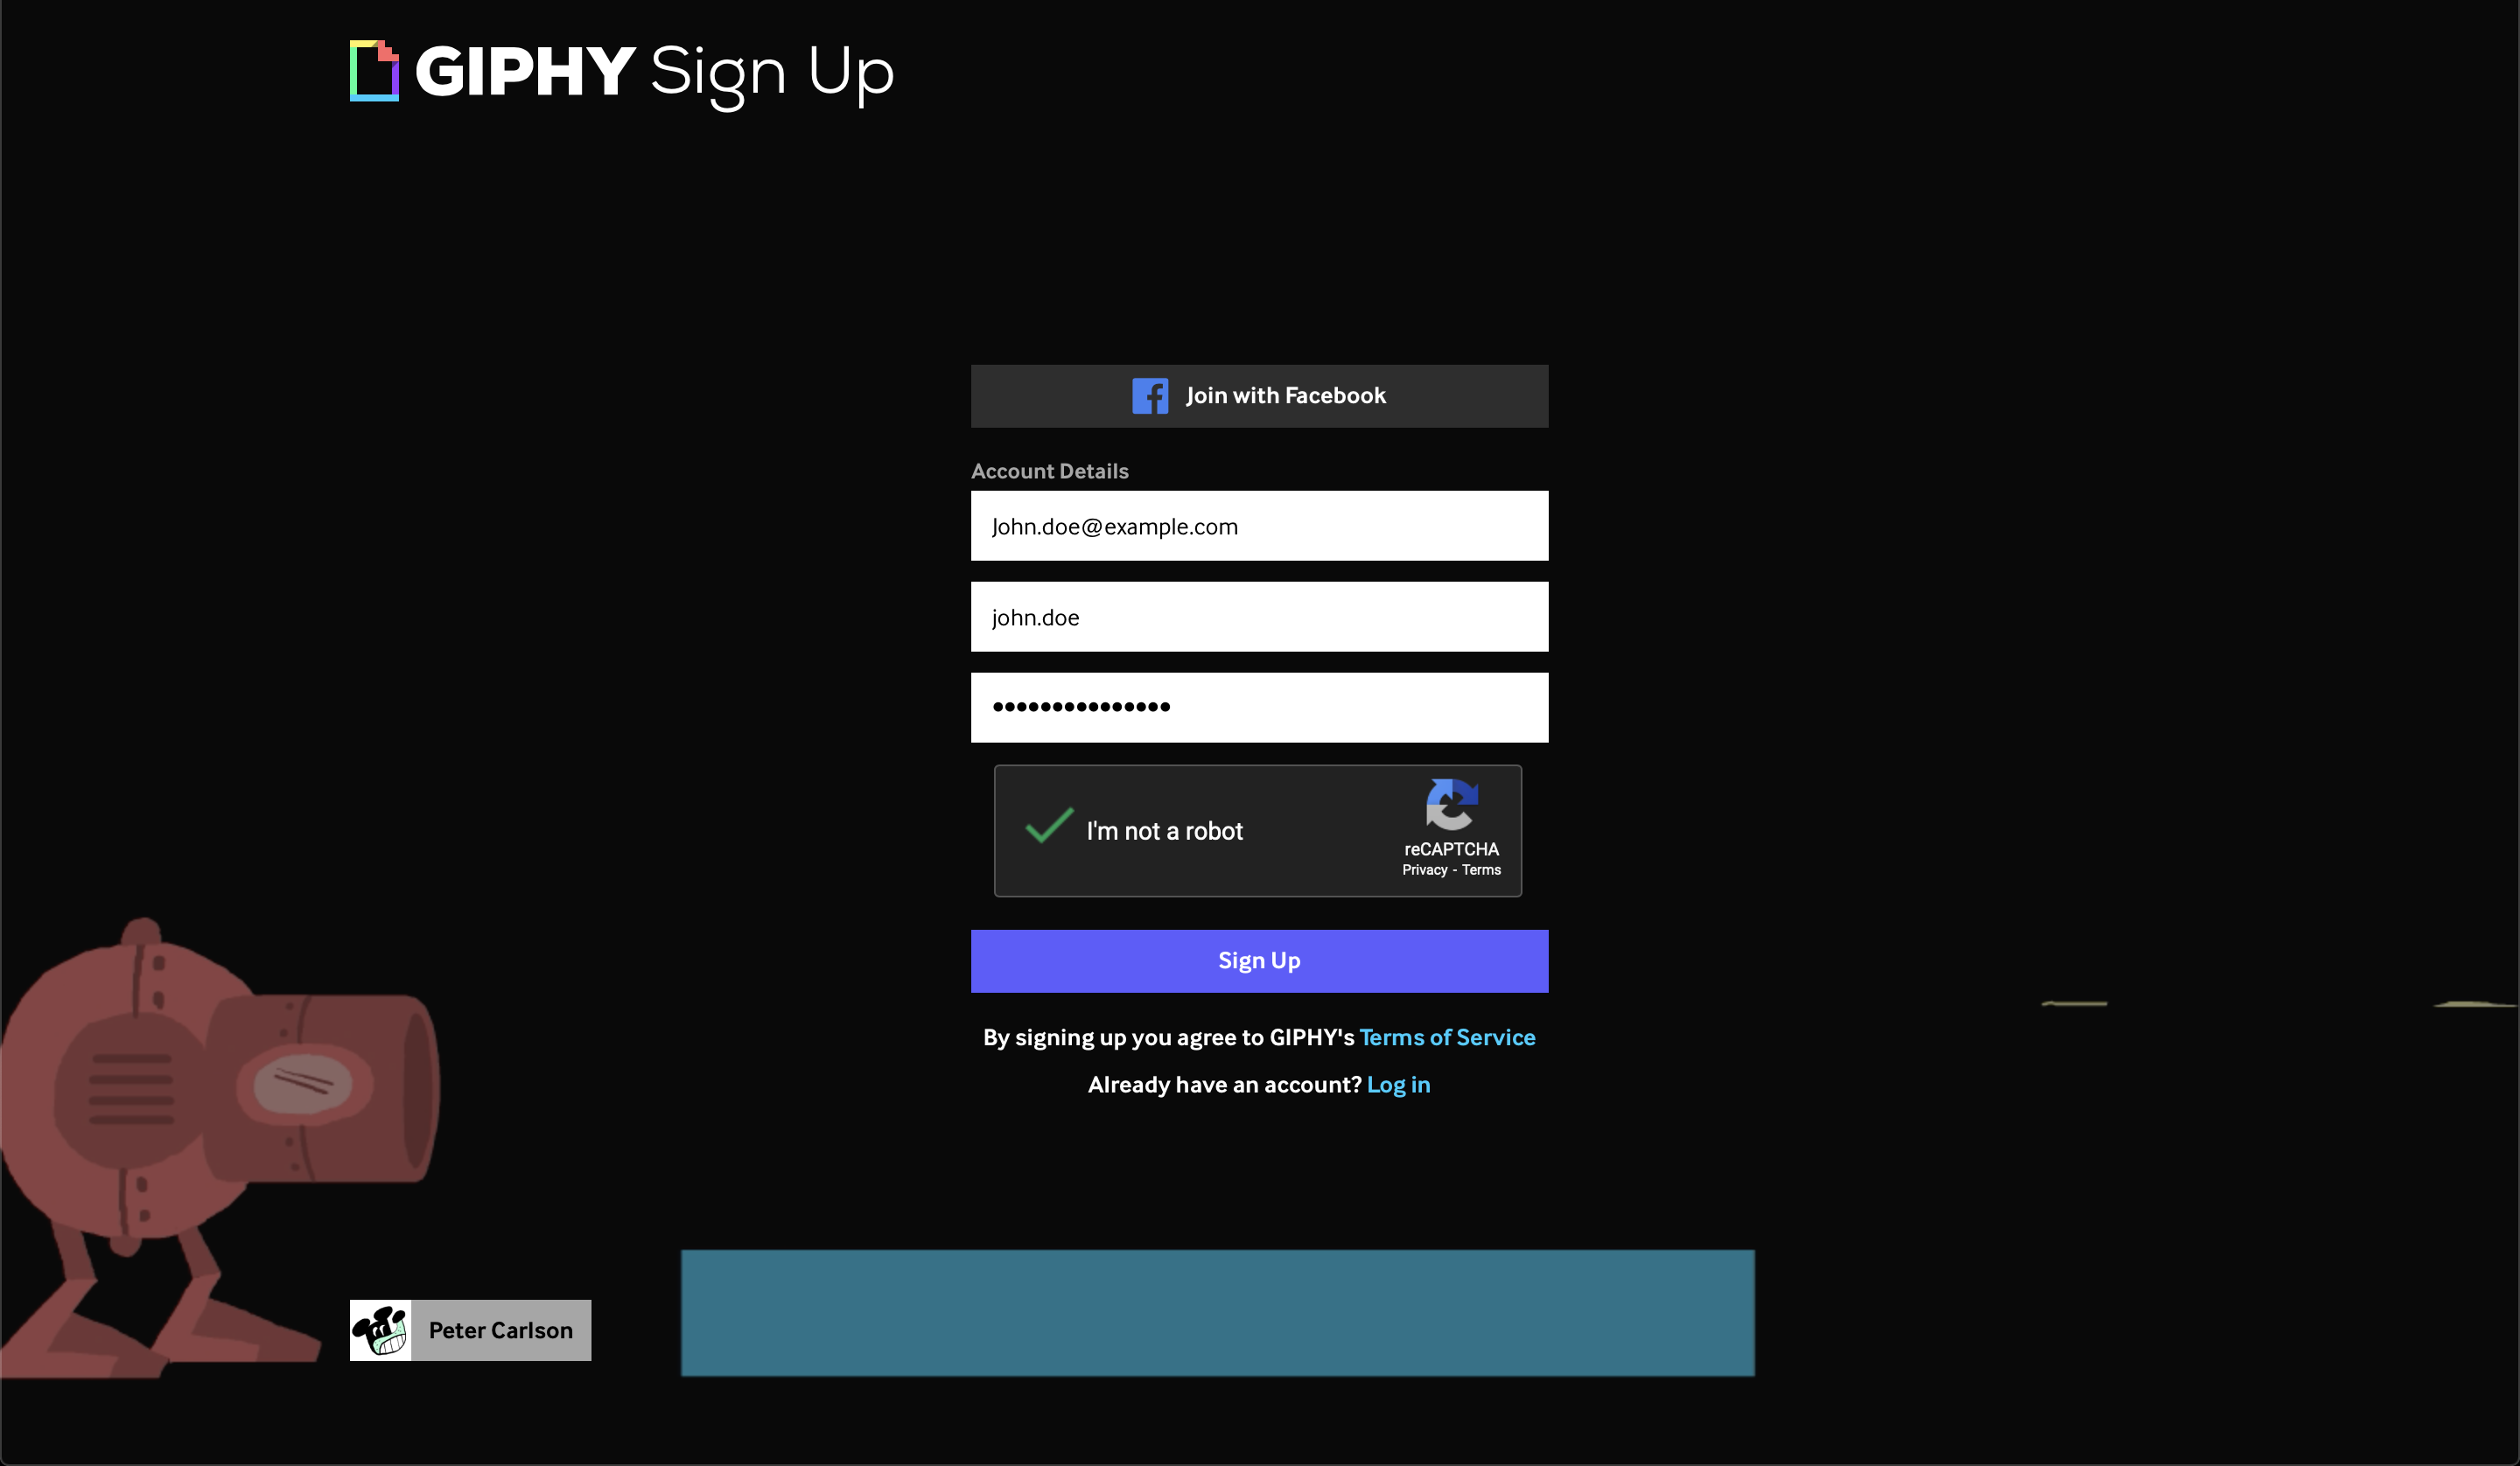
There's nothing new here, just your typical e-mail and password form, with an boosted username field.
Step 2: Create an Application
After creating your GIPHY business relationship, you can jump into the Developer Dashboard to see your existing applications:
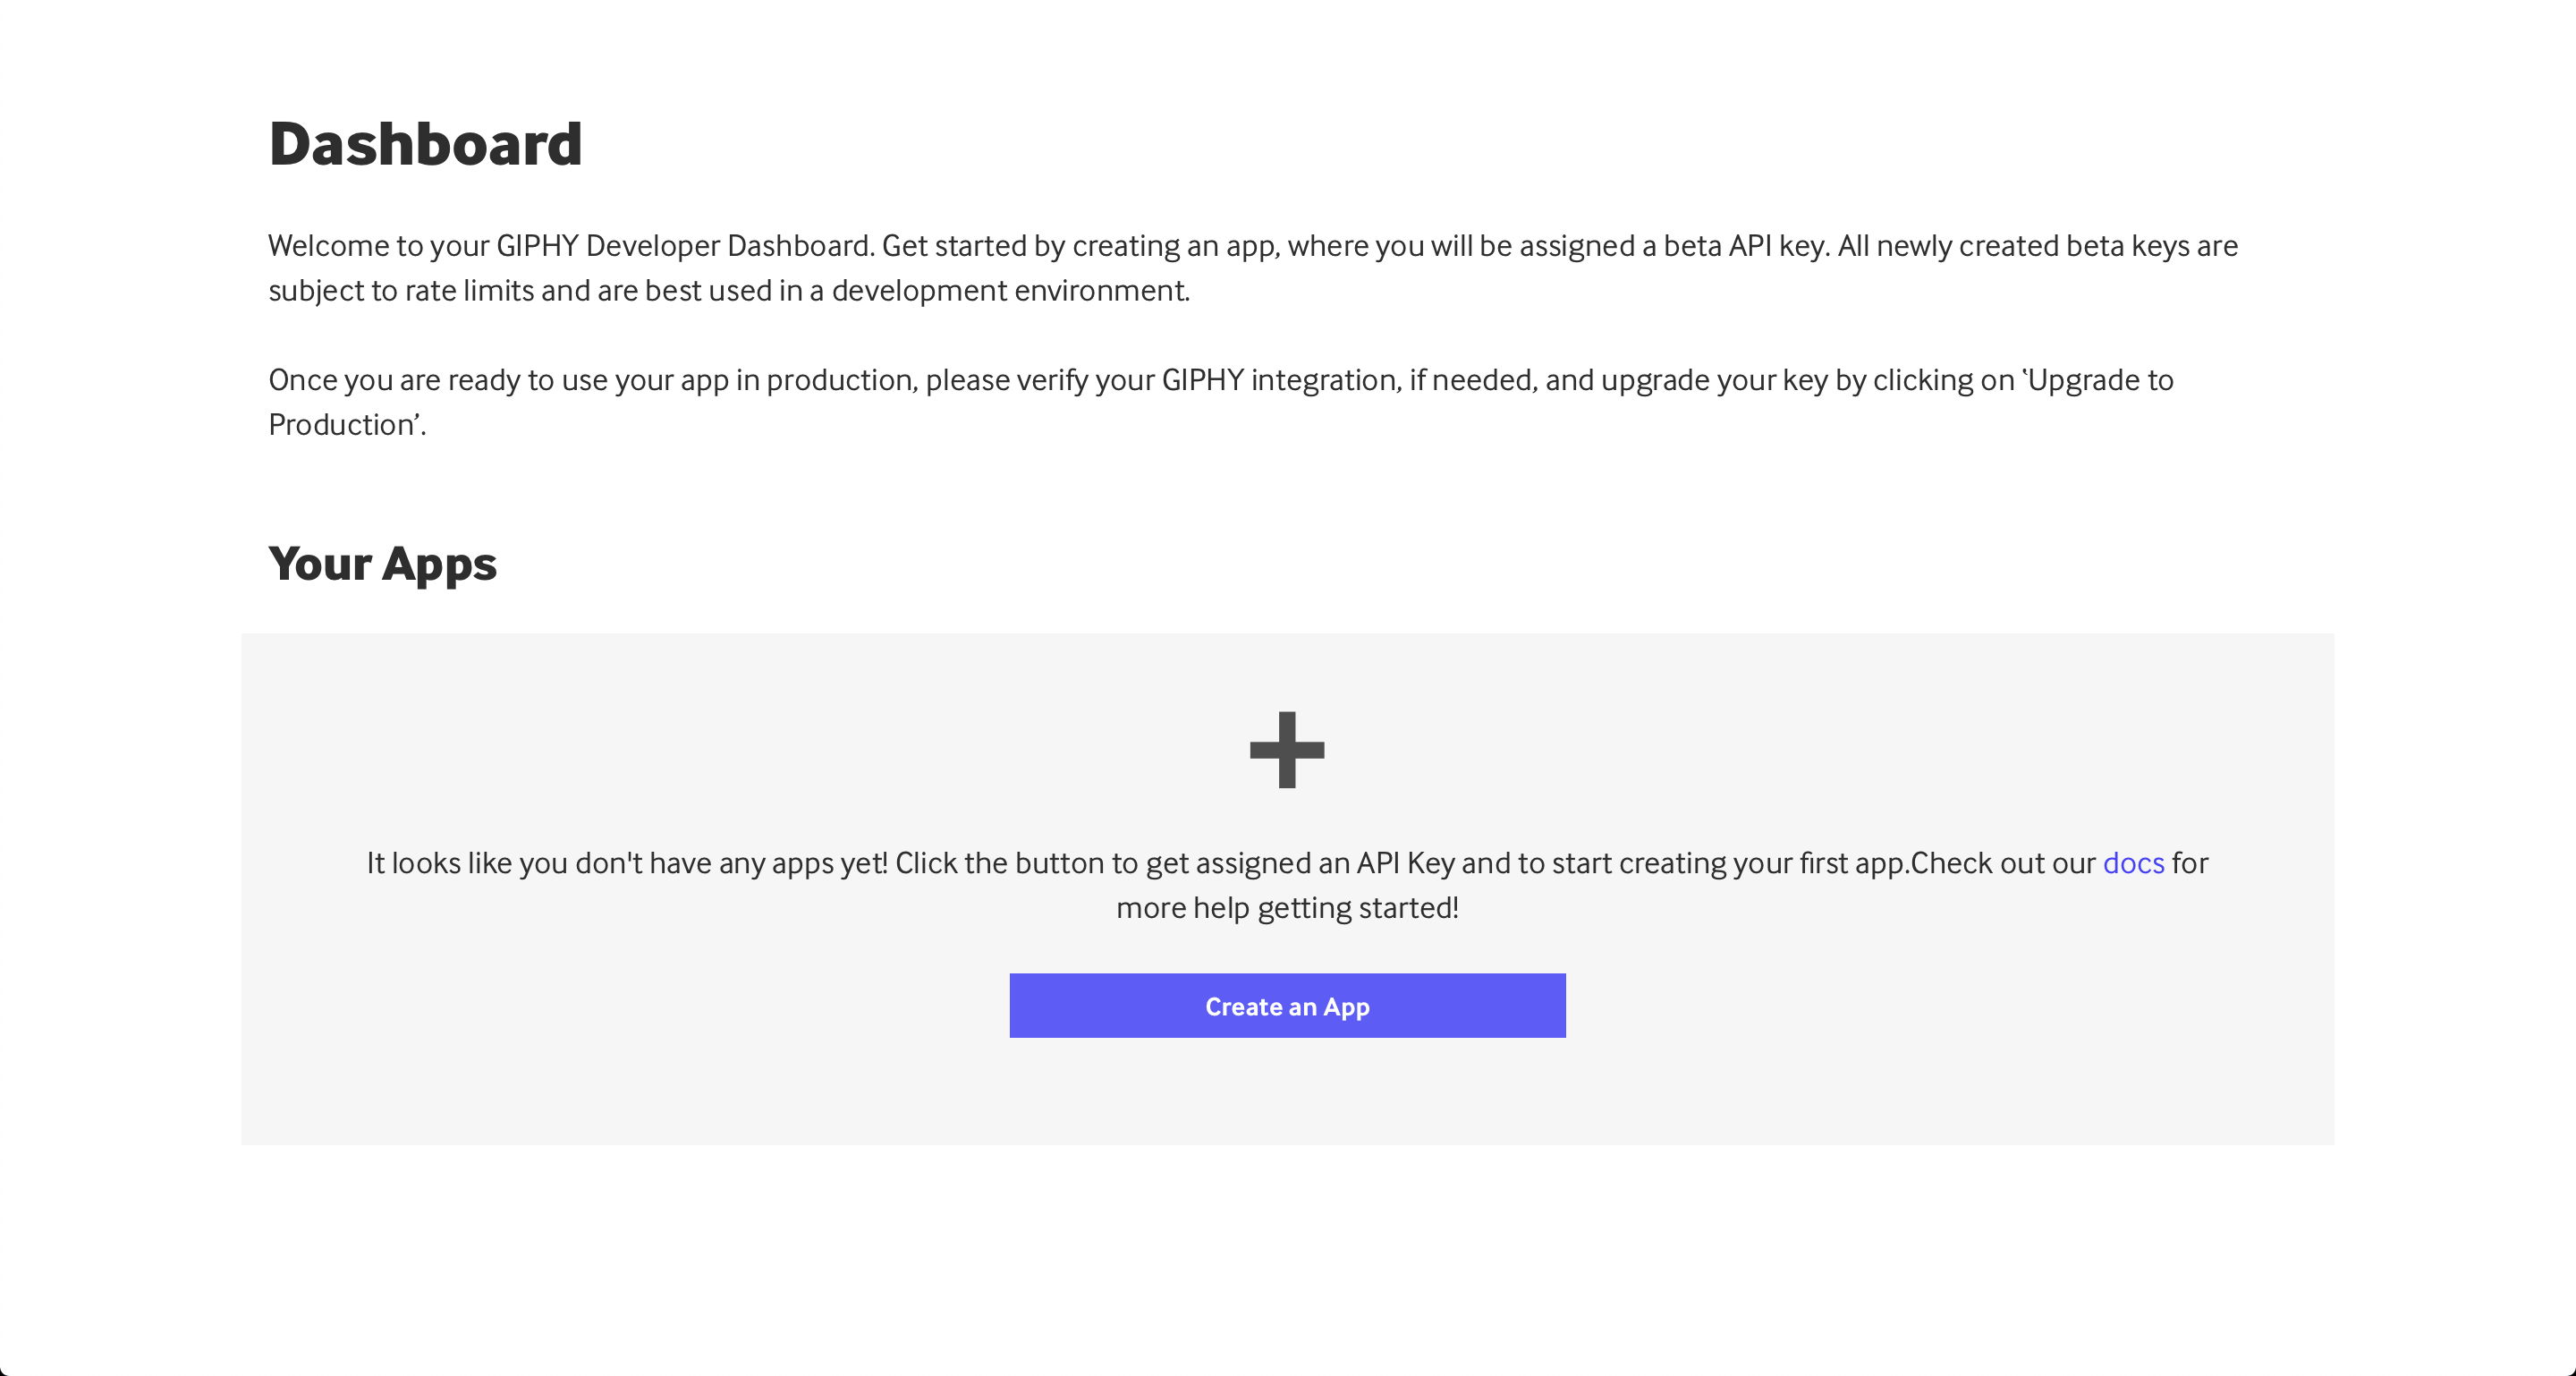
In this case, you lot haven't set upwards an awarding nonetheless, then it looks a bit empty. You lot can create your get-go awarding by clicking Create an App:
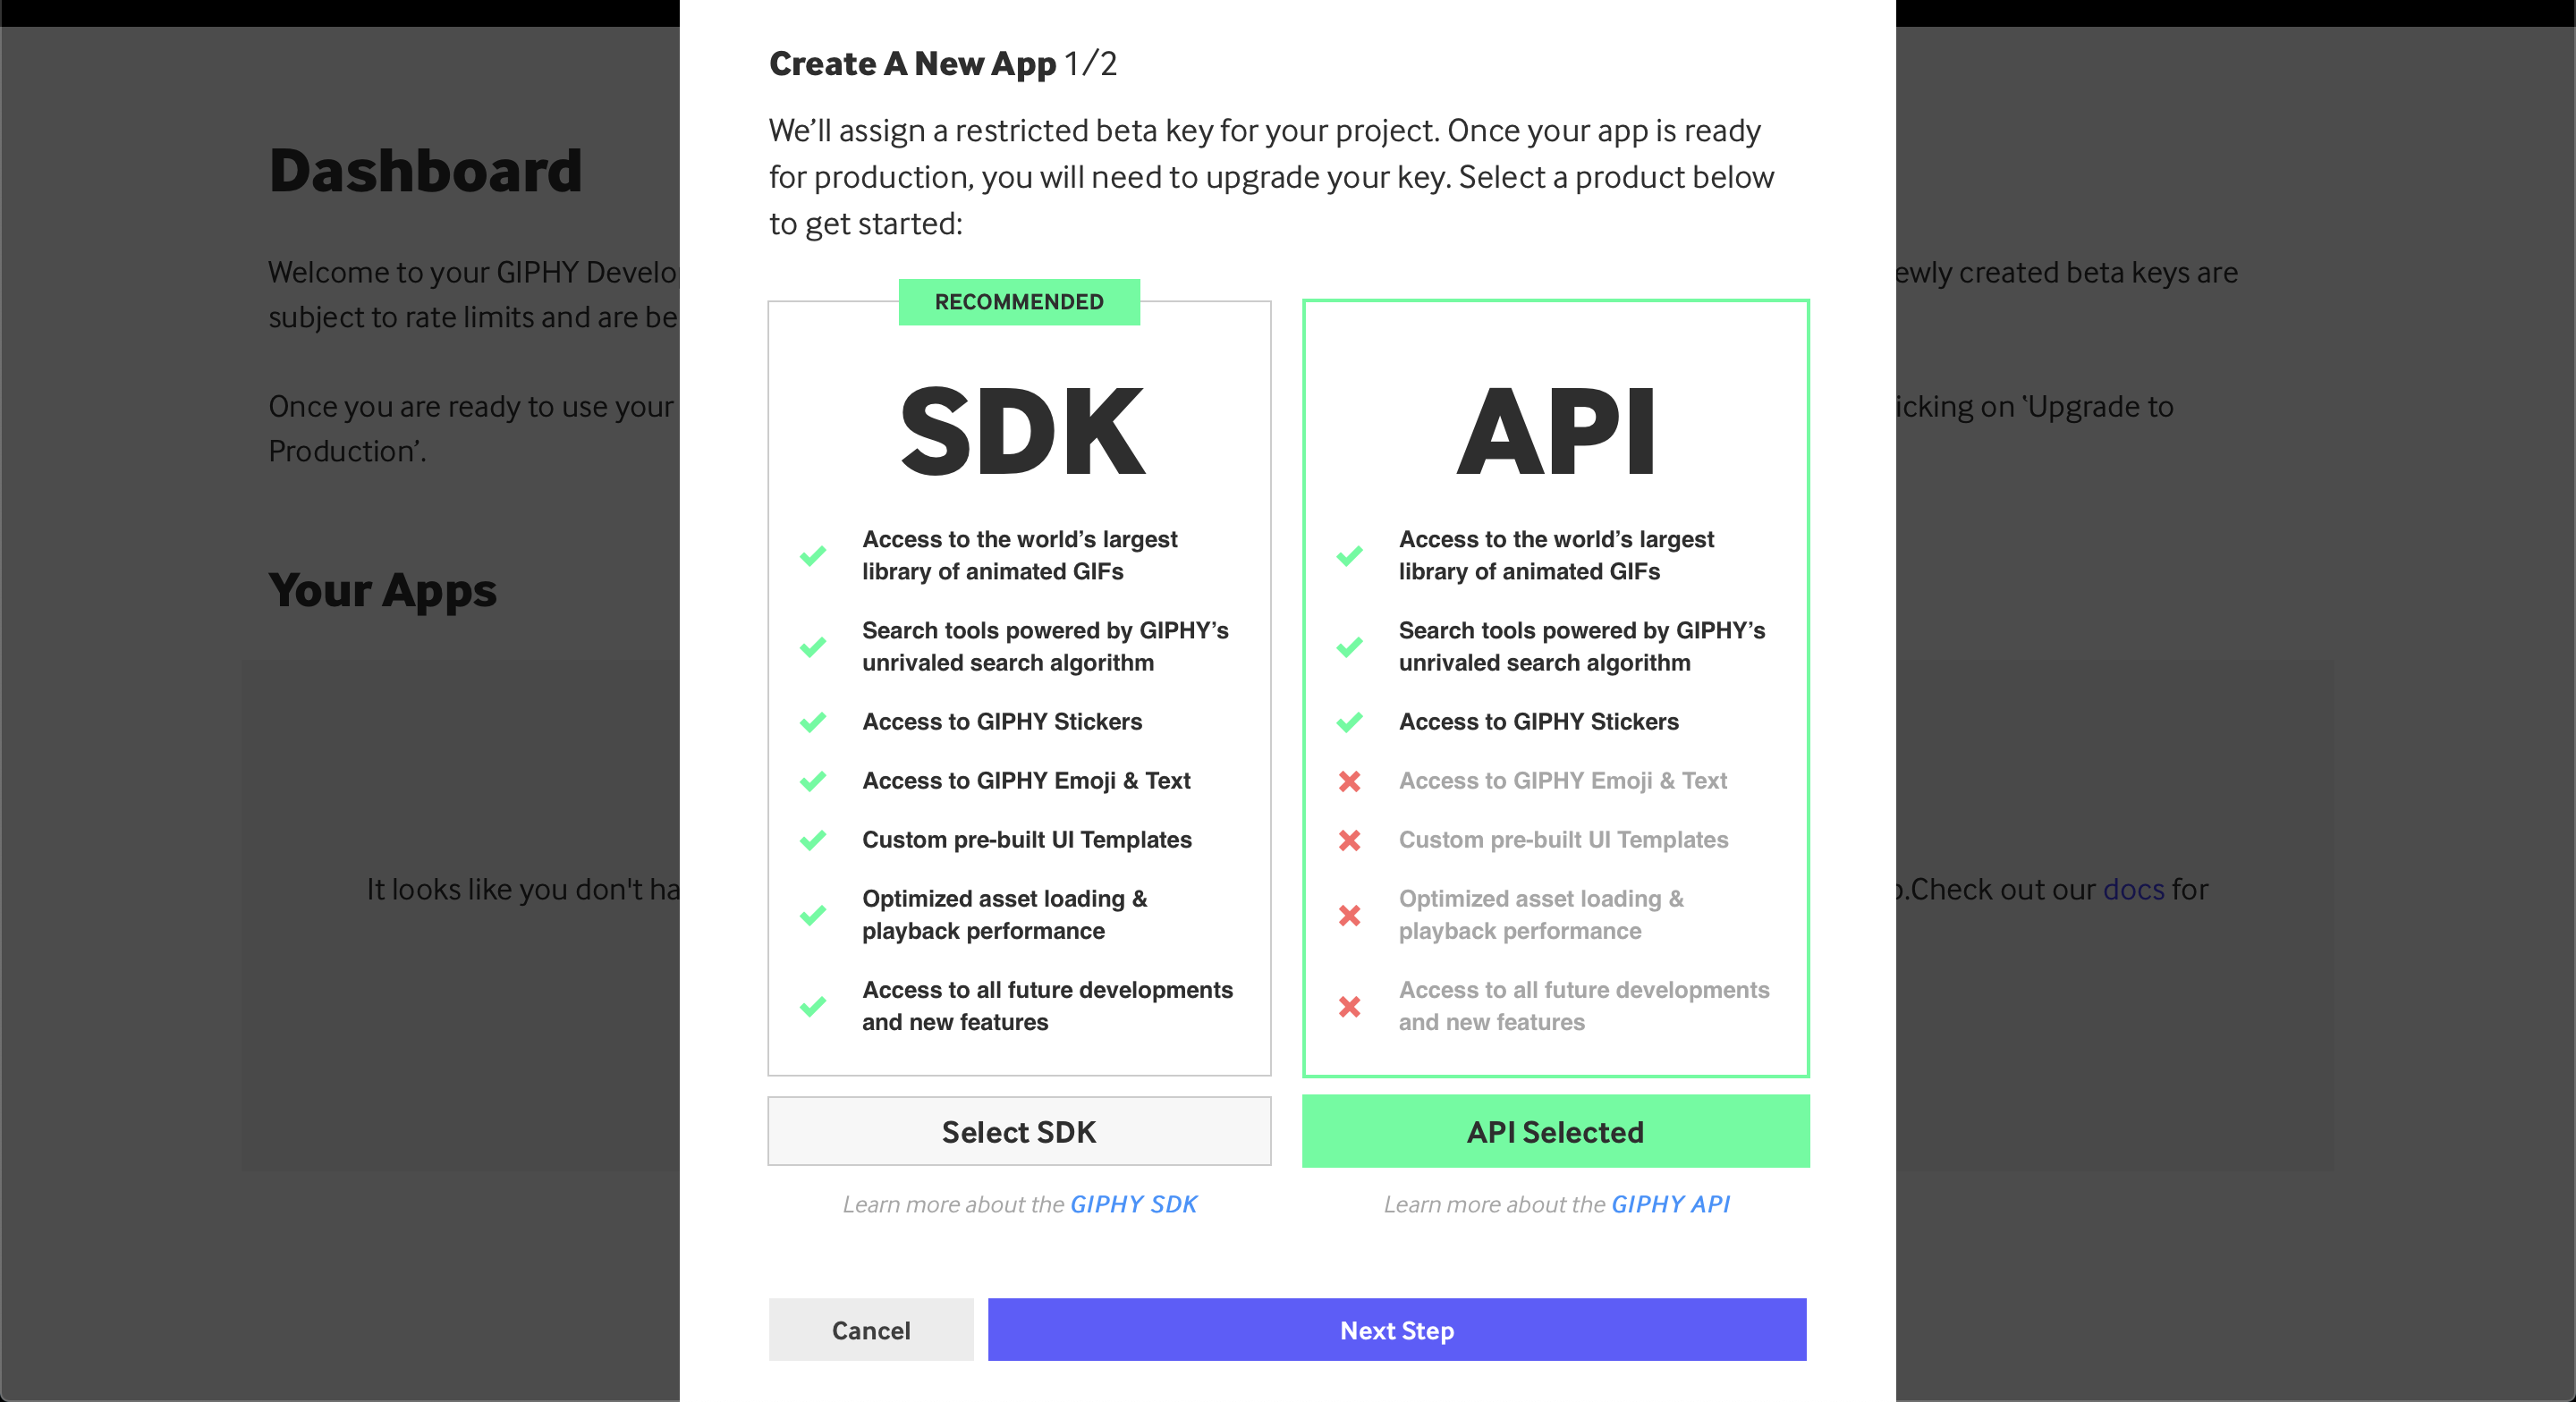
Brand certain to select the API version, not the SDK 1. Subsequently that, y'all'll be asked to fill in a few more details about your application:
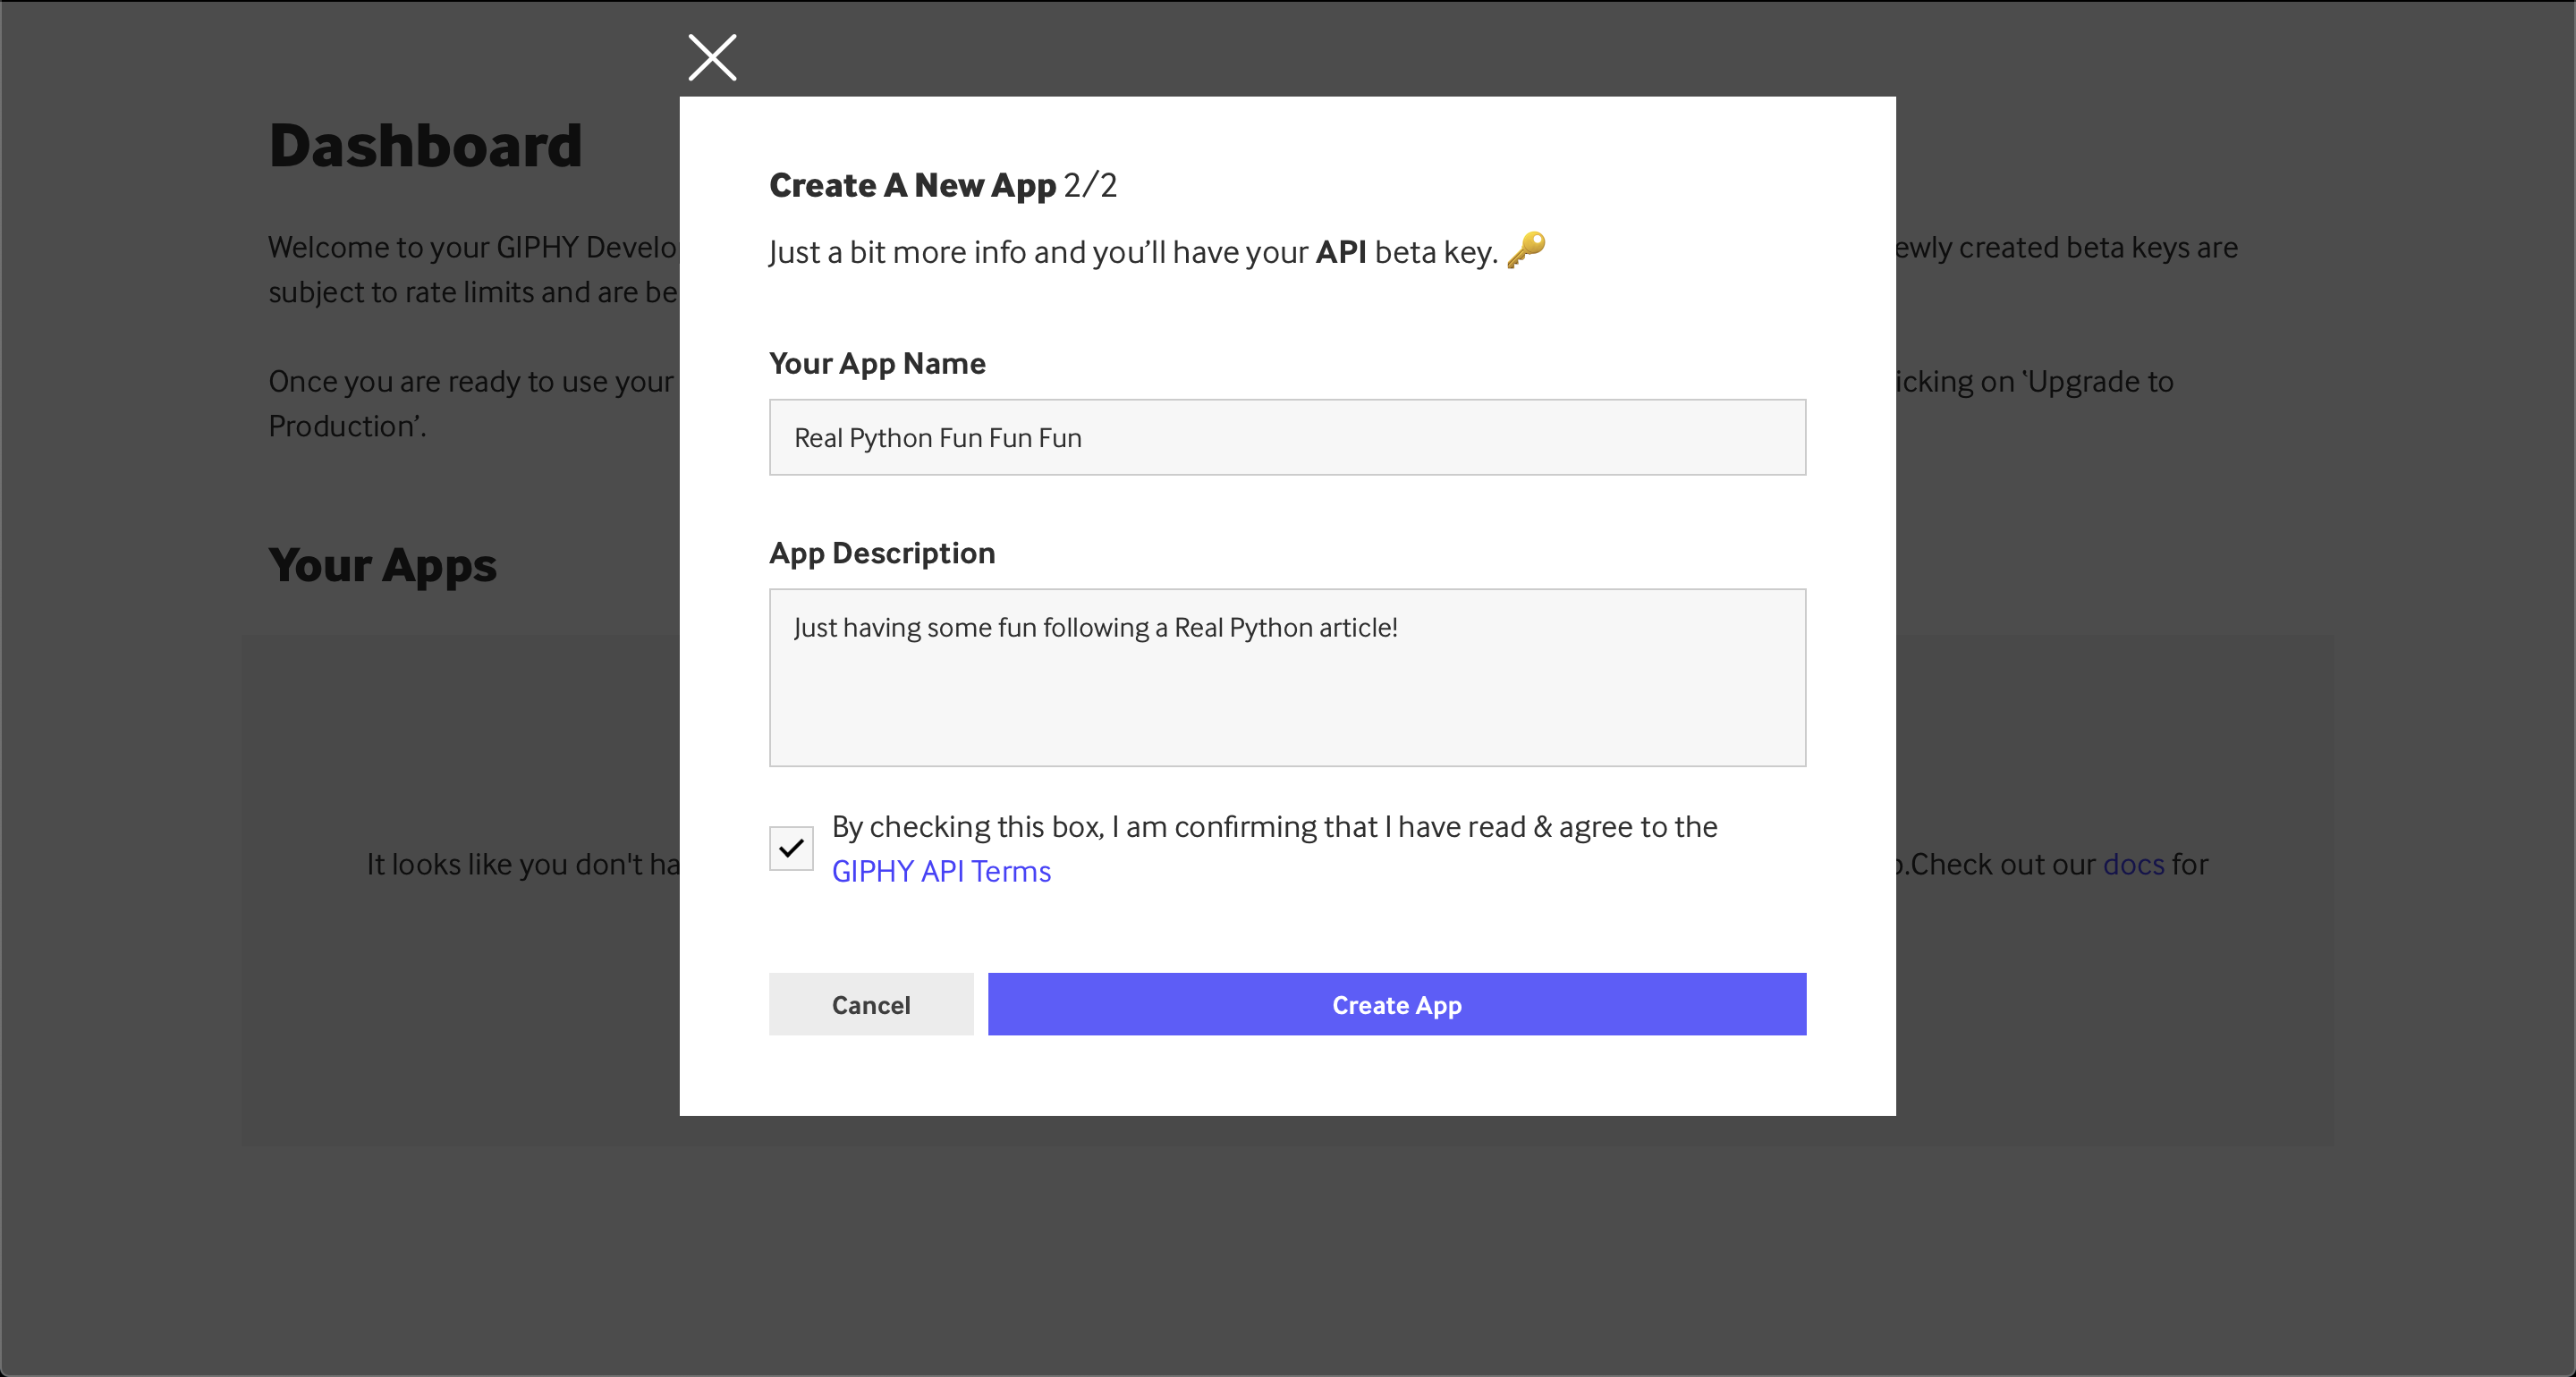
You tin run into an example application name and clarification in a higher place, but feel complimentary to fill these out every bit you adopt.
Step 3: Fetching the API Key
Once y'all've completed the steps above, y'all should get a new app in your Dashboard, below the Your Apps section. In there, you'll accept an API fundamental similar and so:
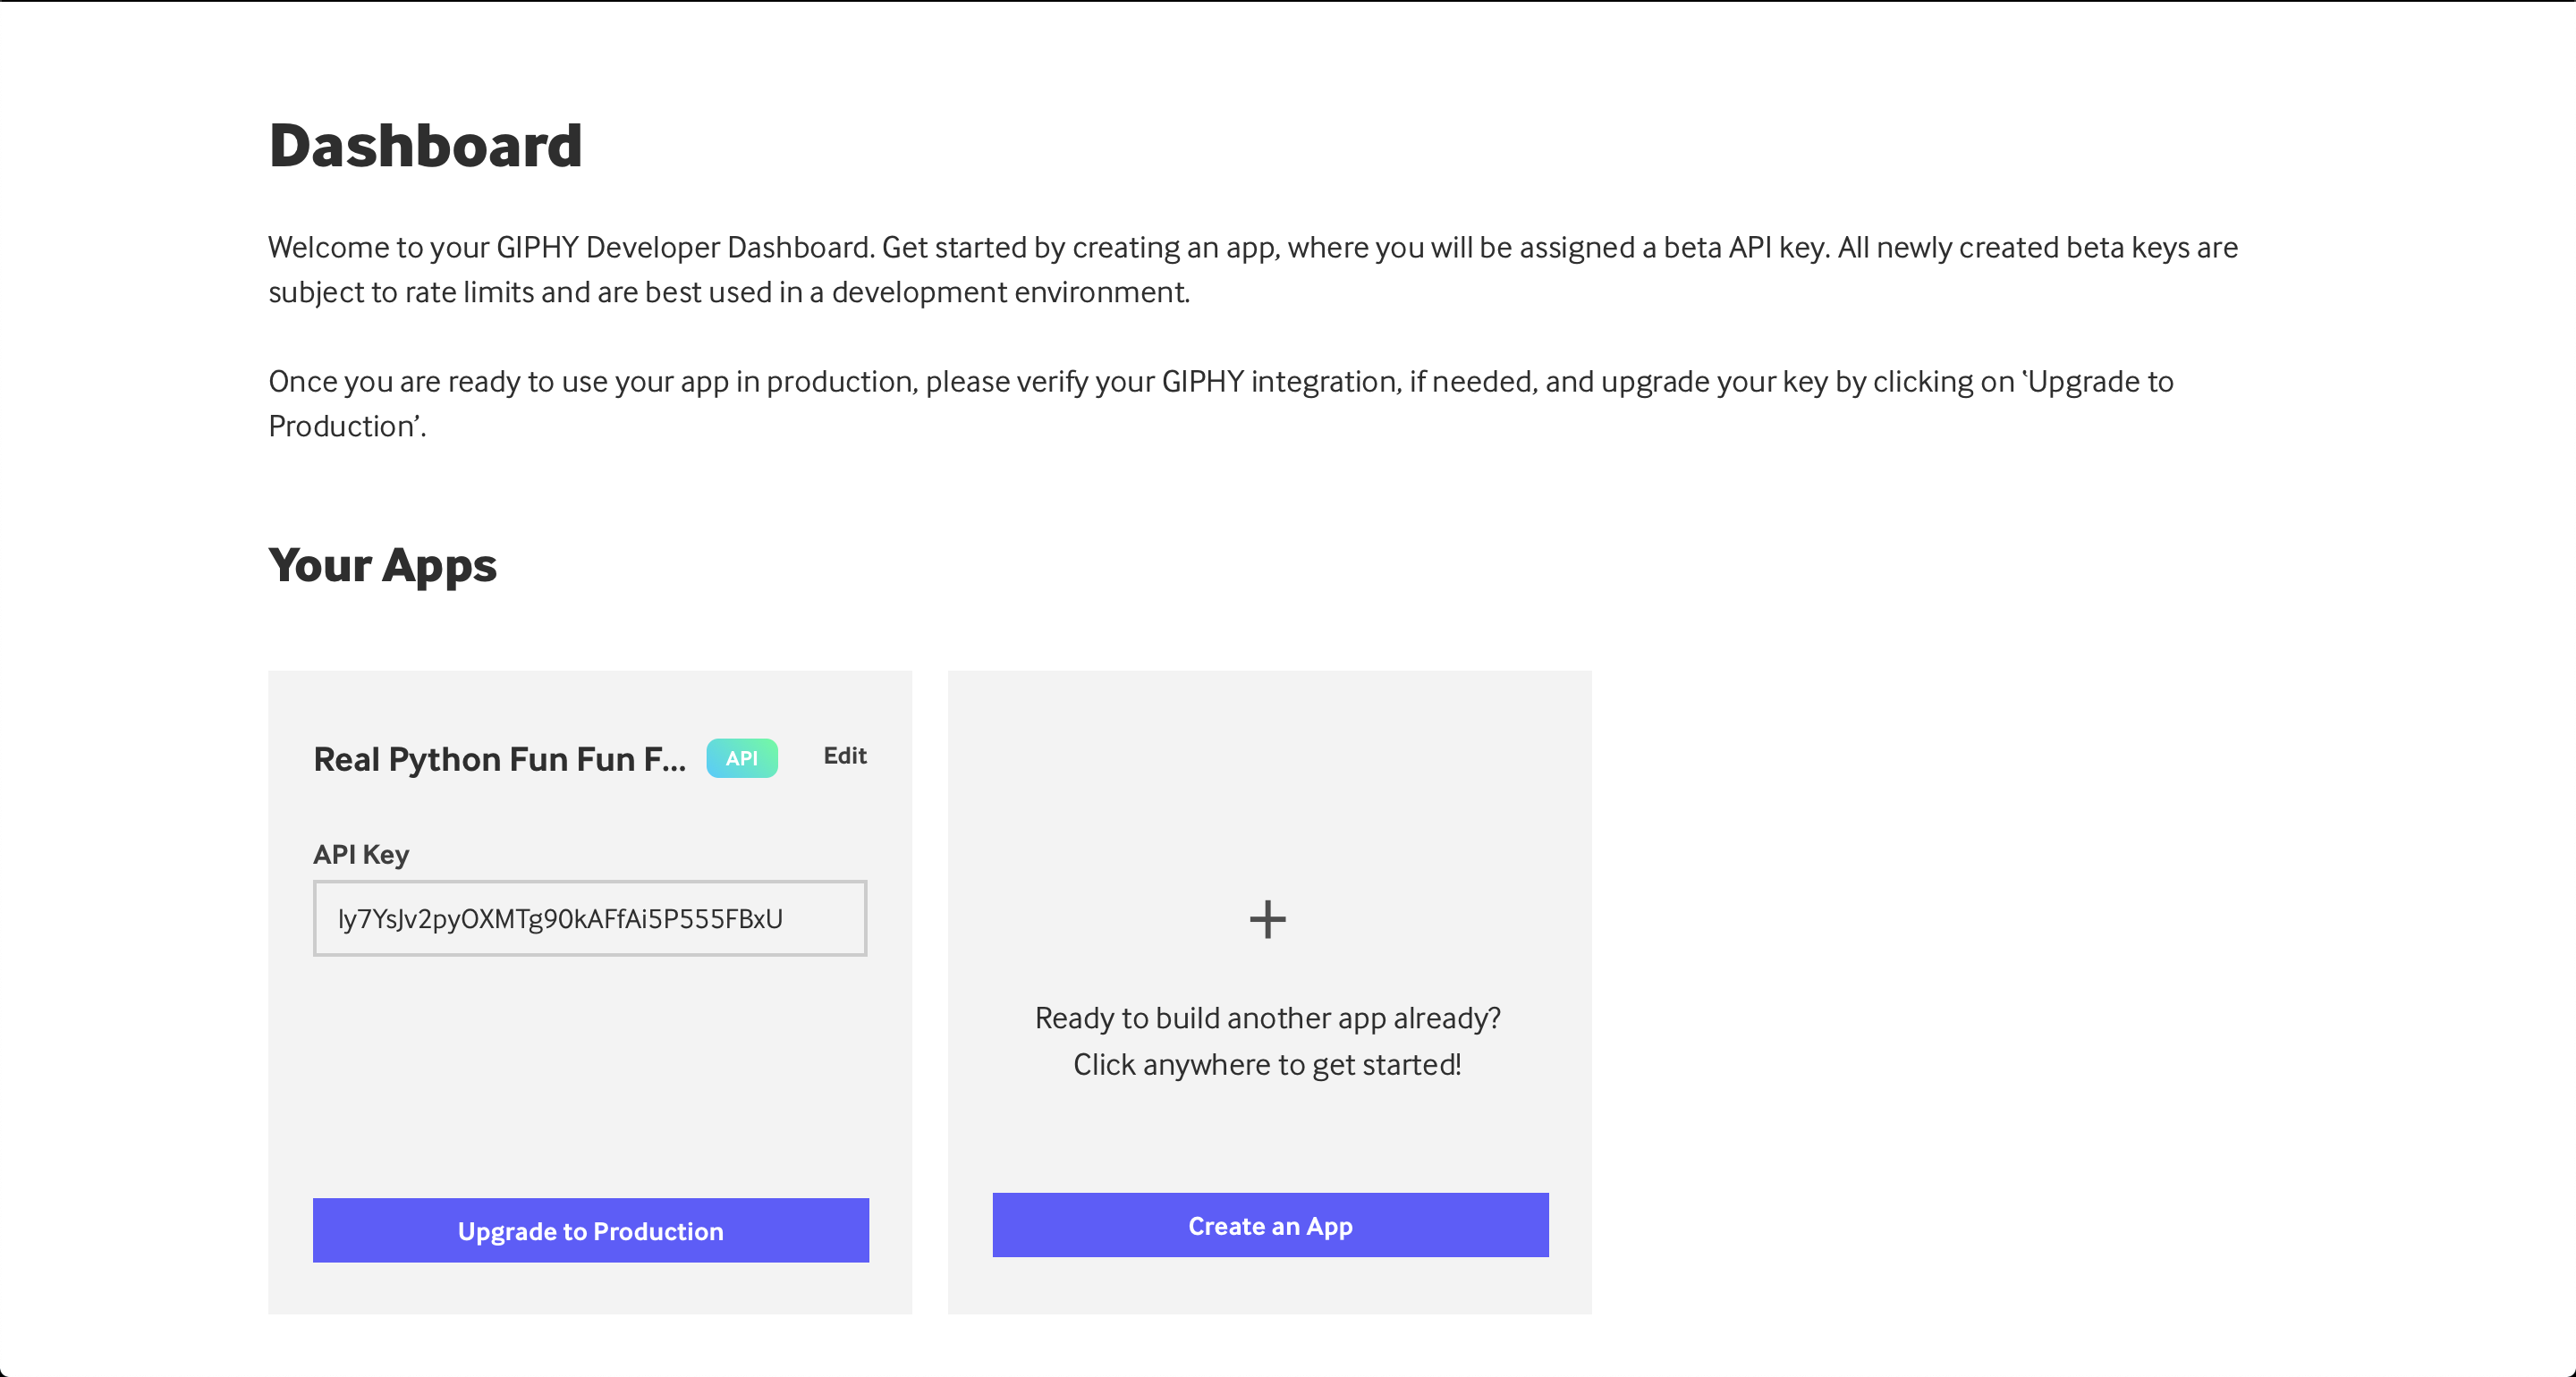
Now you lot tin can copy and paste this API key into your code to make GIPHY API requests.
After yous have the API primal in your hands, you lot can start writing some lawmaking to swallow this API. Even so, sometimes you desire to run some tests before yous implement a lot of code. I know I do. The thing is, a few APIs will actually provide yous with tools to fetch API data directly from the documentation or their dashboard.
In this particular example, GIPHY provides you with an API Explorer that, after you create your app, allows you to start consuming the API without writing a line of code.
Some other APIs will provide y'all with explorers inside the documentation itself, which is what TheDogAPI does on the bottom of each API reference page.
In any instance, you tin can e'er use lawmaking to consume APIs, and that'due south what y'all'll do here. Catch the API key from the dashboard and, by replacing the value of the API_KEY variable below, yous can start consuming the GIPHY API:
one import requests two 3 # Supercede the following with the API central generated. 4 API_KEY = "API_KEY" v endpoint = "https://api.giphy.com/v1/gifs/trending" 6 7 params = { "api_key" : API_KEY , "limit" : three , "rating" : "g" } 8 response = requests . get ( ENDPOINT , params = params ) . json () 9 for gif in response [ "data" ]: 10 title = gif [ "championship" ] 11 trending_date = gif [ "trending_datetime" ] 12 url = gif [ "url" ] thirteen print ( f " { title } | { trending_date } | { url } " ) At the tiptop of the file, on lines four and 5, you define your API_KEY and the GIPHY API endpoint since they won't modify every bit often as the residue.
On line 7, making apply of what you lot learned in the query parameters department, you ascertain the params and add your own API key. You lot also include a couple of other filters: limit to become 3 results and rating to get only advisable content.
Finally, after getting a response, yous iterate through the results on line nine. For each GIF, you impress its title, engagement, and URL on line 13.
Running this piece of lawmaking in the console would output a somewhat structured list of GIFs:
Excited Schitts Creek GIF by CBC | 2020-11-28 twenty:45:14 | https://giphy.com/gifs/cbc-schittscreek-schitts-creek-SiGg4zSmwmbafTYwpj Saved By The Bell Shrug GIF by PeacockTV | 2020-xi-28 20:30:15 | https://giphy.com/gifs/peacocktv-saved-by-the-bell-bayside-high-schoolhouse-dZRjehRpivtJsNUxW9 Schitts Creek Thank You lot GIF by CBC | 2020-11-28 20:15:07 | https://giphy.com/gifs/cbc-funny-comedy-26n79l9afmfm1POjC Now, let'south say yous desire to make a script that allows you to search for a specific word and fetch the first GIPHY match to that word. A different endpoint and slight variation of the lawmaking above can do that quite quickly:
import requests # Replace the following with the API key generated. API_KEY = "API_KEY" endpoint = "https://api.giphy.com/v1/gifs/search" search_term = "shrug" params = { "api_key" : API_KEY , "limit" : one , "q" : search_term , "rating" : "grand" } response = requests . become ( endpoint , params = params ) . json () for gif in response [ "information" ]: championship = gif [ "title" ] url = gif [ "url" ] impress ( f " { title } | { url } " ) In that location y'all take information technology! Now yous tin can modify this script to your liking and generate GIFs on demand. Try fetching GIFs from your favorite show or movie, adding a shortcut to your terminal to get the well-nigh popular GIFs on demand, or integrating with another API from your favorite messaging arrangement—WhatsApp, Slack, you proper name information technology. And then start sending GIFs to your friends and coworkers!
Getting COVID-nineteen Confirmed Cases Per State
Even though this may be something that you're tired of hearing about by now, there'south a gratis API with upwardly-to-date globe COVID-19 data. This API doesn't require hallmark, and so it'southward pretty straightforward to get some data right away. The free version that you'll employ below has a charge per unit limit and some restrictions on the information, but it's more than plenty for small use cases.
For this example, you'll go the total number of confirmed cases upwards to the previous 24-hour interval. I randomly picked Frg over again as the country, but you can pick whatsoever country slug you like:
1 import requests 2 from datetime import date , timedelta iii 4 today = engagement . today () 5 yesterday = today - timedelta ( days = 1 ) half dozen state = "germany" 7 endpoint = f "https://api.covid19api.com/state/ { country } /status/confirmed" viii params = { "from" : str ( yesterday ), "to" : str ( today )} ix x response = requests . get ( endpoint , params = params ) . json () 11 total_confirmed = 0 12 for day in response : 13 cases = day . get ( "Cases" , 0 ) xiv total_confirmed += cases 15 16 print ( f "Total Confirmed Covid-19 cases in { country } : { total_confirmed } " ) On lines i and 2, you import the necessary modules. In this case, you have to import the date and timedelta objects to exist able to get today'due south and yesterday'south dates.
On lines six to 8, yous define the land slug you want to use, the endpoint, and the query parameters for the API asking.
The response is a list of days, and for each day you lot accept a Cases field that contains the total number of confirmed cases on that date. On line 11, you lot create a variable to proceed the total number of confirmed cases, and then on line 14 you lot iterate through all the days and sum them upwards.
Printing the end result volition show you lot the total number of confirmed cases in the selected country:
Total Confirmed Covid-19 cases in frg: 1038649 In this instance, you're looking at total number of confirmed cases for a whole state. However, you could besides try looking at the documentation and fetching the data for your specific metropolis instead. And why non make it a chip more thorough and get some other data, such as the number of recovered cases?
Searching Google Books
If y'all have a passion for books, so yous might want a quick mode to search for a specific book. Yous might even want to connect it to your local library's search to see if a given book is bachelor using the book's ISBN.
For this example, you'll use the Google Books API and the public volumes endpoint to practice simple searches of books.
Hither's a straightforward piece of code to look for the words moby dick in the whole catalog:
i import requests two iii endpoint = "https://www.googleapis.com/books/v1/volumes" 4 query = "moby dick" 5 6 params = { "q" : query , "maxResults" : three } 7 response = requests . become ( endpoint , params = params ) . json () viii for book in response [ "items" ]: 9 book = book [ "volumeInfo" ] x title = volume [ "title" ] 11 published = book [ "publishedDate" ] 12 description = volume [ "clarification" ] 13 impress ( f " { title } ( { published } ) | { description } " ) This code example is pretty similar to the ones you've seen before. Yous start on lines iii and iv past defining important variables, such as the endpoint and, in this instance, the query.
After making the API request, on line 8 you first iterating through the results. Then, on line xiii, yous print the most interesting information for each book that matches your initial query:
Moby-Dick (2016-04-12) | "Call me Ishmael." And then begins the famous opening... Moby Dick (1892) | A literary classic that wasn't recognized for its... Moby Dick; Or, The Whale (1983-08-xvi) | The story of Captain Ahab's... You can impress the book variable inside the loop to encounter what other fields you take bachelor. Here are a few that could be useful for further improving this lawmaking:
-
industryIdentifiers -
averageRatingandratingsCount -
imageLinks
A fun challenge to practise with this API is to utilize your OAuth cognition and create your own bookshelf app that keeps records of all the books yous read or want to read. You can fifty-fifty connect information technology to your favorite bookstore or library later on to apace detect books from your wish list that are available near yous. This is merely ane idea—I'grand sure you tin can come upwardly with more.
Conclusion
There are a million other things you tin can acquire about APIs: dissimilar headers, different content types, different hallmark techniques, and so on. However, the concepts and techniques you learned in this tutorial will permit you lot to practise with any API of your liking and to use Python for any API consumption needs you may have.
In this tutorial, you lot learned:
- What an API is and what tin can you use it for
- What condition codes, HTTP headers, and HTTP methods are
- How tin can you use Python to eat public data using APIs
- How to employ authentication when consuming APIs with Python
Go alee and attempt this new magic skill with some public APIs of your liking! You can likewise review the examples you saw in this tutorial by downloading the source code from the link below:
Further Reading
The APIs used equally examples in this tutorial are just a tiny fraction of the numerous public APIs available for free. Here's a list of API collections that you can use to discover your next favorite API:
- GitHub Public APIs repository
- Public APIs
- Public API
- Any API
You can cheque these out and notice an API that speaks to y'all and your hobbies and perhaps inspires you to practice a small project with information technology. If you come beyond a expert public API that you think I or other people reading the tutorial should know about, so delight leave a annotate below!
Source: https://realpython.com/python-api/
0 Response to "Is Something Wrong With Gymbox Again"
Post a Comment